PBR Textures in Maya: Hypershade, Color Space and Tiling for FS25
In current Maya versions, creating a new material defaults to an OpenPBR Surface, while Arnold's aiStandardSurface stays available through the bundled MtoA plugin. For our textures you wire the six maps through file nodes with the right color space, match the normal map's green-channel convention, and set tiling through place2dTexture's Repeat UV values.
- Version
- Maya 2027.2 (as of 2026-09-25), Arnold (MtoA) bundled
- Default material
- OpenPBR Surface since Maya 2026, aiStandardSurface still available
- You need
- Maya with the Arnold plugin, our PBR textures or FBX models
- GIANTS export
- Maya Exporter Plugins 10.0.1 for FS25, free on the GDN
What a PBR material needs in Maya
A PBR material describes a surface through measurable physical values instead of a single flat color: a base color, a roughness value, a metalness value, and a normal map for fine detail that costs no extra geometry. Maya builds this through shading networks in Hypershade, the window where you create materials and wire up their nodes.
Our textures ship six maps per resolution: _diff for base color, _rough for roughness, _ao for ambient occlusion, _disp for height, _nor_gl as a normal map in OpenGL convention, and _arm, a packed map with AO in the red channel, roughness in green and metalness in blue. There is no separate metalness file; that value sits in the blue channel of _arm.
 AI-generated
Hypershade: creating a material and reading the network
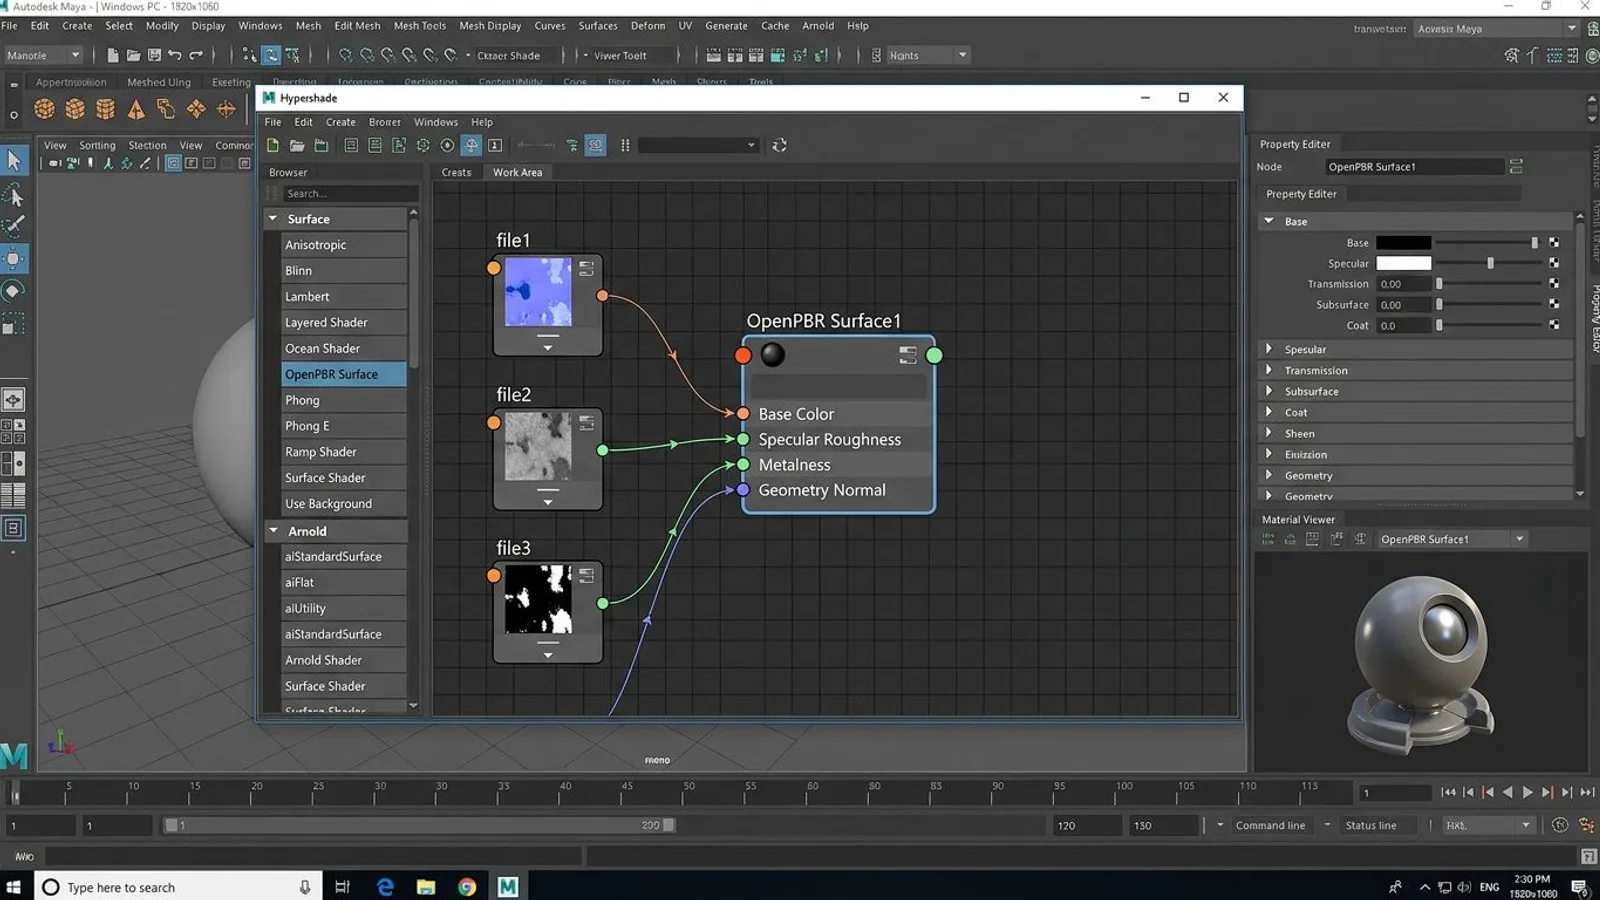
Opening Windows, Rendering Editors, Hypershade shows a Create panel on the left listing the available materials, a work area in the middle for the shading network, and a browser at the top listing materials already in the scene. Dragging an OpenPBR Surface or aiStandardSurface material into the work area creates a single node with editable inputs such as base color, roughness and metalness.
To wire in one of our textures, drag a separate file node into the work area for every image, point it at the matching JPG or PNG through the folder icon in the Attribute Editor, and connect its output to the desired material input, either by middle-mouse dragging or through the Connection Editor. Because our _arm image carries three values in one picture, you don't connect the full output; you connect the individual color channels instead: the red output for AO, the green output for roughness, the blue output for metalness. Every color output on a file node exposes these three sub-values as separate connection points automatically.
Neither material offers a dedicated input for the ambient occlusion map, because AO isn't a physical material value, it's pre-baked shading information. The common approach is multiplying the AO map into the base color through a multiplyDivide node before the result reaches Base Color. With our packed _arm image you can use either the separate _ao file or the red channel of _arm; both carry the same value.
Once a material combines several textures, it pays to tidy the network layout before you build further tiles or variants from it. Hypershade's Work Area tab remembers the layout per material, and a clean network with clearly labeled file nodes saves you the hunt later when you need to change a single map's color space or file path.
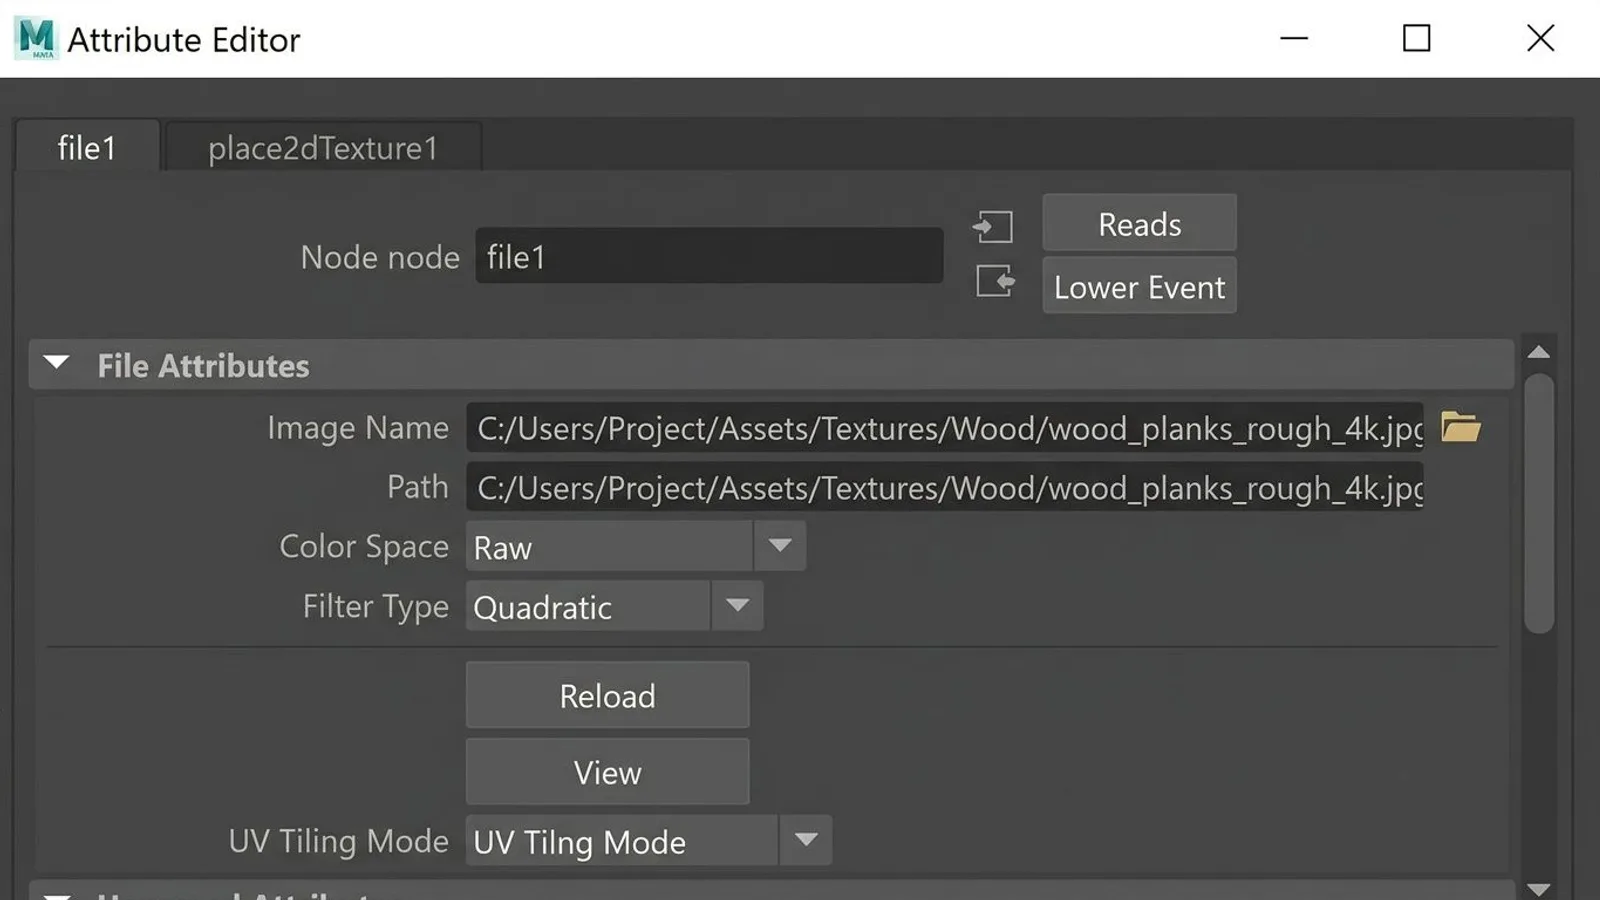
File nodes and color space: sRGB or Raw
Every file node has a Color Space setting in the Attribute Editor. Only our base color map (_diff) is meant as a color image and runs on sRGB. Every other map in our package encodes measured values rather than color impressions and belongs on Raw, so Maya doesn't wrongly apply the sRGB curve to it:
| File suffix | Content | Color space in the file node |
|---|---|---|
_diff |
Base color | sRGB |
_rough |
Roughness | Raw |
_ao |
Ambient occlusion | Raw |
_disp |
Height / displacement | Raw |
_nor_gl |
Normal map (OpenGL) | Raw |
_arm |
AO, roughness, metalness packed | Raw |
A wrong color space setting doesn't announce itself immediately, since Maya still displays an image, just with shifted values: a roughness map left on sRGB reads as uniformly soapy-shiny instead of finely varied, and a normal map on sRGB creates visible dents on surfaces that should be flat.
 AI-generated
Normal maps: aiNormalMap or bump2d in tangent-space mode
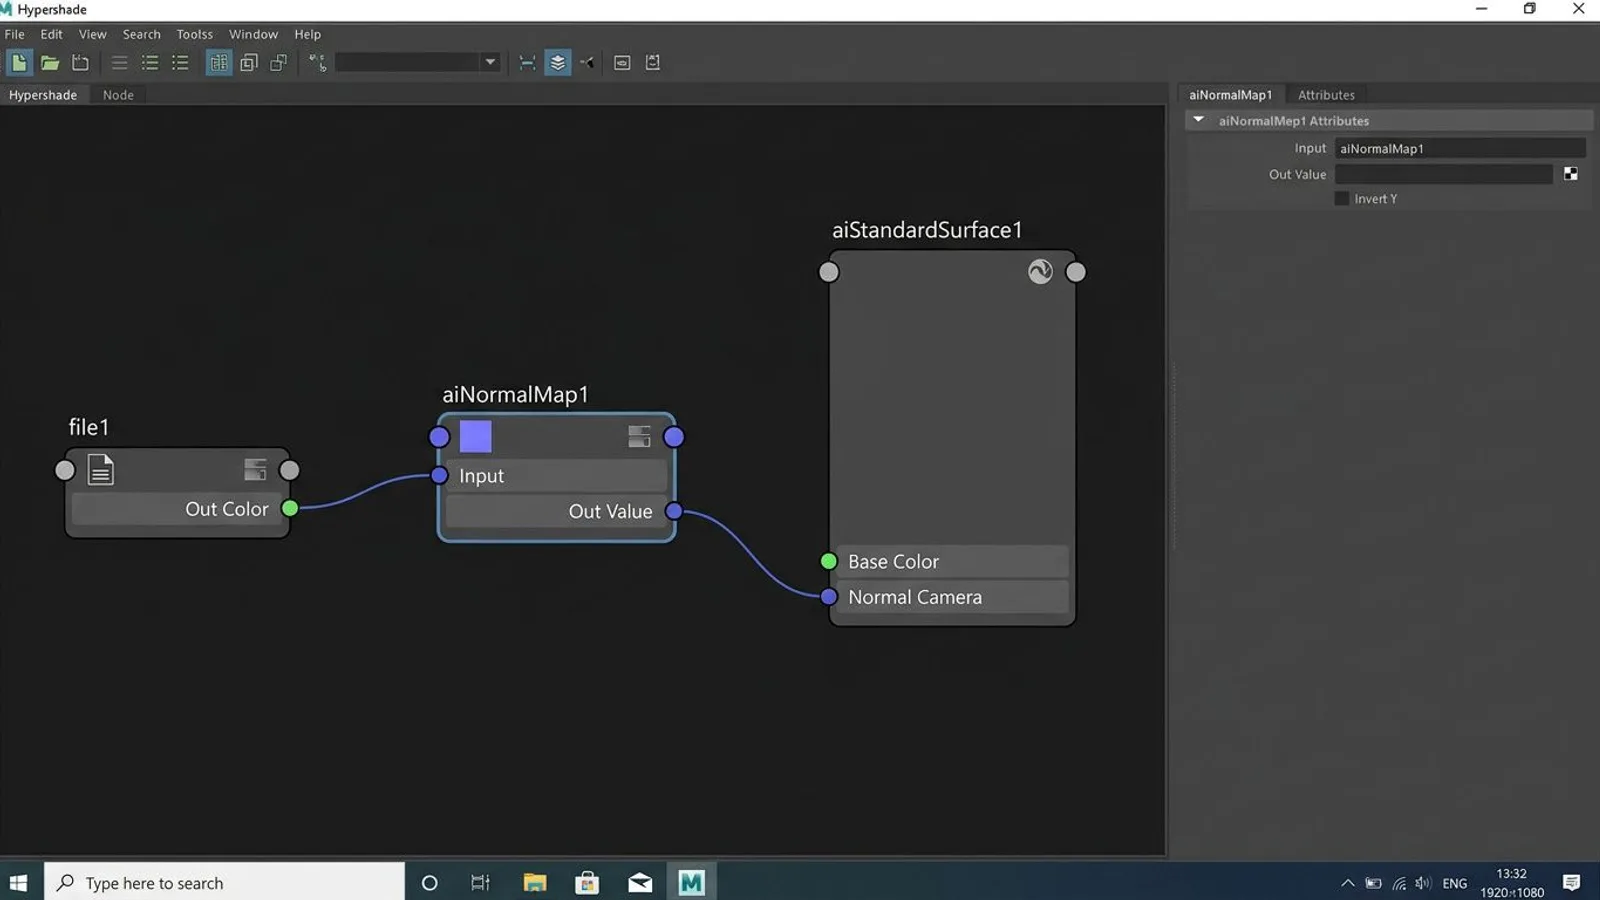
With an Arnold material, you don't connect our _nor_gl texture directly; you route it through an aiNormalMap node: the file node into the Input slot, and the aiNormalMap node's Out Value output into the material's Normal Camera input. Without an Arnold material, for instance with a classic Maya shader, the bump2d node takes over the same job, provided you set Use As in the 2d Bump Attributes section to Tangent Space Normals instead of the default Bump.
Both paths hinge on the same convention: whether the normal map's green channel points up or down separates the OpenGL variant from the DirectX one. Our _nor_gl files follow OpenGL, the format aiNormalMap expects with no extra setting. The Invert Y option on the aiNormalMap node flips exactly that channel when needed; turn it on only for a third-party normal map built in DirectX convention, never for our own files.
 AI-generated
Tiling for our texture size: place2dTexture and Repeat UV
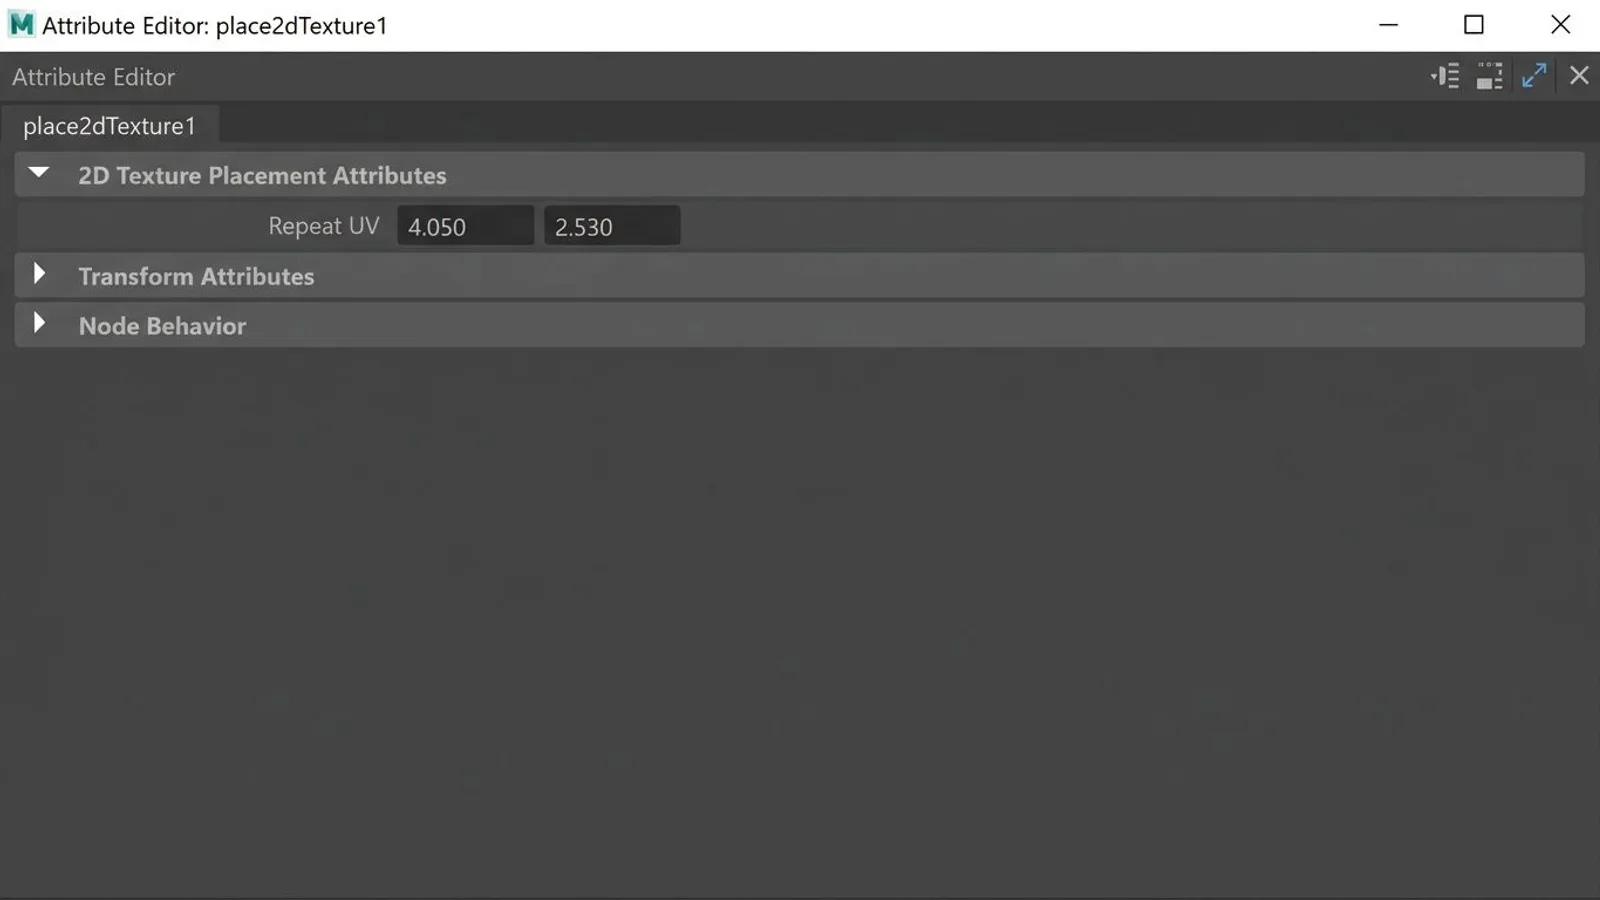
Every file node is attached to a place2dTexture node that controls the texture's UV placement on the surface. The Repeat UV values set how often the texture repeats across the assigned UV area, separately for the U and V directions.
Our textures are built for a fixed tile size, for example 1 meter for Cracked Concrete 01, 1.2 meters for Oak Planks 01, or 1.5 meters for Cobblestone 01. To cover a real surface correctly, divide its edge length in meters by the texture's tile size. A 4-by-2.5-meter wall using the Cracked Concrete texture with its 1-meter tile gives a Repeat U of 4 and a Repeat V of 2.5, assuming the surface's UVs already match its real-world dimensions.
| Texture | Tile size | Repeat UV on a 4 × 2.5 m surface |
|---|---|---|
| Cracked Concrete 01 | 1 m | 4 / 2.5 |
| Oak Planks 01 | 1.2 m | 3.33 / 2.08 |
| Cobblestone 01 | 1.5 m | 2.67 / 1.67 |
| Rusty Corrugated Metal 01 | 0.988 m | 4.05 / 2.53 |
| Corrugated Metal 01 | 0.684 m | 5.85 / 3.65 |
 AI-generated
Importing our FBX models
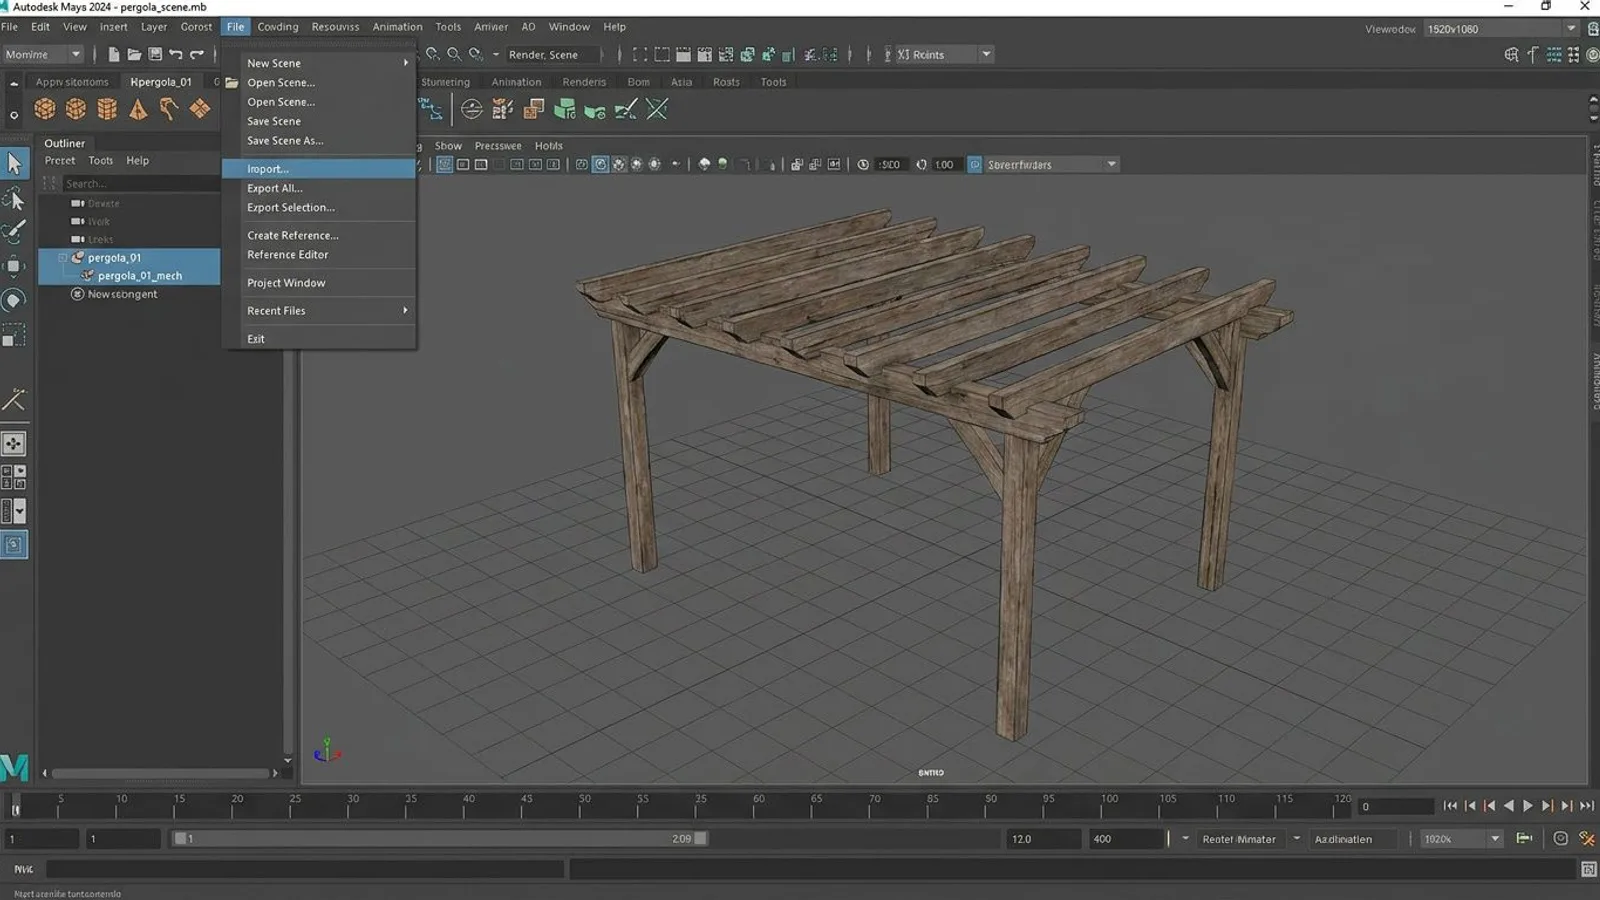
Our 3D model packages ship a .blend and a .gltf file alongside an .fbx, whose textures live in the accompanying .fbm folder. In Maya, load it through File, Import, then pick the FBX format. Maya recreates objects, hierarchy, and, if the FBX stores them, material references too. If a material points at Maya's pink default checker instead of our texture after import, it's almost always because the .fbm folder no longer sits next to the FBX file. Pointing the affected file nodes at the unpacked folder manually in the Attribute Editor fixes it.
Maya defaults to Y as its up axis, matching our 3D model packages, which are consistently built Y-up for GIANTS processing. An import with no extra axis correction therefore already lands correctly oriented in Maya.
 AI-generated
If you want to export your own models straight to the GIANTS Editor rather than just importing our packages, the GDN offers the Maya Exporter Plugins in version 10.0.1 for Farming Simulator 25. They write i3d files from Maya, the GIANTS Editor's native scene format, complementing the FBX import that covers our finished packages.
How normal maps differ across programs in general is covered in the normal map overview, and how to carry the same values into a program like 3ds Max is in the 3ds Max guide. A general overview of PBR textures lives in the PBR textures fundamentals guide.
Common problems in Maya
| Problem | Cause | Fix |
|---|---|---|
| Normal map looks pitted or inverted | The file node's color space is set to sRGB instead of Raw, or the map follows the wrong green-channel convention | Set the file node's color space to Raw; for a DirectX-sourced map, enable Invert Y on the aiNormalMap node |
| Material stays gray or black in the Arnold Render View | The normal map node's output isn't connected to Normal Camera, or the render view isn't refreshing automatically | Explicitly connect the aiNormalMap node's Out Value to Normal Camera and restart the Arnold Render View once |
| Texture doesn't repeat at the expected tile size | Repeat UV on the place2dTexture node is still at its default value of 1 | Set Repeat U and Repeat V to the surface's edge length divided by the texture's tile size |
| FBX import shows pink or missing textures | The .fbm folder with the texture files no longer sits next to the FBX file |
Manually point the texture path in the affected file nodes at our unpacked texture folder |
Frequently asked questions
Should I use OpenPBR Surface or aiStandardSurface for your textures?
Either works, because our maps follow the same PBR scheme of base color, roughness, metalness and normal. Since Maya 2026, creating a new material in Hypershade defaults to OpenPBR Surface. Arnold's aiStandardSurface stays reachable through the Create menu once MtoA is installed, and MtoA ships bundled with Maya.
Which color space should I set on the file node for your textures?
Only the base color map (_diff) uses the sRGB color space. Roughness, ambient occlusion, the packed ARM map, the normal map and the height map all belong on Raw, because they encode values rather than colors.
Which green-channel convention do your normal maps expect in Maya?
Our _nor_gl files follow the OpenGL convention. Leave Invert Y unchecked on the aiNormalMap node. Only turn Invert Y on if you plug in a DirectX-style normal map from another source, never for our own files.
How do I set the tiling for your texture's real-world size?
Through the Repeat UV values on the place2dTexture node attached to each file node. Divide the edge length of your surface in meters by the texture's tile size, so a 4-meter wall with a 1-meter tile gives Repeat U of 4.
Is there a dedicated Maya exporter for Farming Simulator 25?
Yes. For exporting to the GIANTS Editor's i3d format, the GDN offers the Maya Exporter Plugins in version 10.0.1 for FS25. Our finished FBX packages load independently of that through Maya's own FBX importer.