Setting Up Our PBR Textures in Blender: Material, Nodes, Tile Scale
Create a new material, connect Diffuse (sRGB), Roughness, Normal and ARM (all Non-Color) to the Principled BSDF, then set the tile scale with the Mapping node, for example Scale 3 on a 3.6 m wide wall using a 1.2 m tile.
- Version
- Blender 5.2 LTS (currently 5.2.2, as of September 2026)
- You need
- Blender, our texture pack (2K/4K/8K), 5 minutes
- Add-on
- Node Wrangler ships with Blender, just enable it
- Most common mistake
- Wrong color space: Diffuse is sRGB, everything else is Non-Color
Our PBR textures ship as six maps per resolution: Diffuse, Normal (OpenGL), Roughness, AO, Displacement, and a packed ARM map. In Blender you wire these into a material node by node, inside the Shader Editor. The first time takes about ten minutes. After that, Node Wrangler gets you there in under a minute.
Before you start: UV map and folder structure
Every texture needs a UV map on your object, otherwise Blender has no way to know which part of the image belongs where on the surface. Simple primitives like a cube, plane, or cylinder already come with a usable default UV map when you create them. Imported or hand-modeled geometry usually needs unwrapping yourself (Edit Mode, U, Smart UV Project works for most flat or boxy shapes). If you leave the Vector input on an Image Texture node unconnected, Blender falls back to the object's active UV map automatically anyway.
Give each texture its own folder and extract the resolution you need there. The filenames (_diff, _nor_gl, _rough, _ao, _disp, _arm) stay the same across resolutions with us, only the _2k, _4k, or _8k suffix changes. That makes it easy to bump from 2K to 4K later without rebuilding the node setup.
Create the material
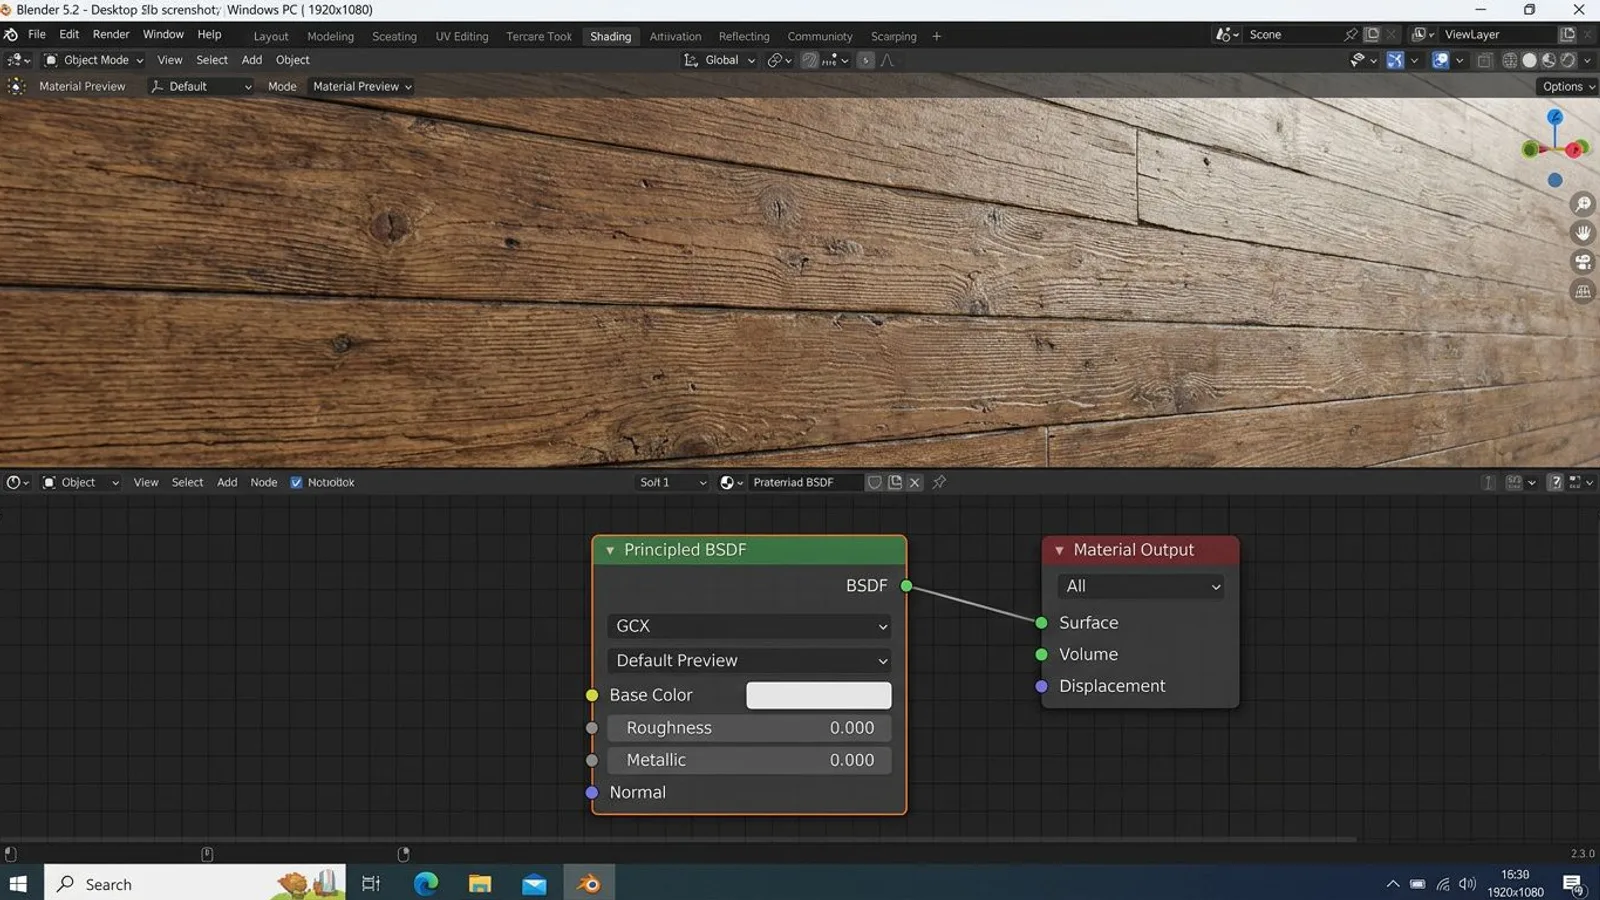
Select your object, switch to the Material Properties tab (the sphere icon in the Properties editor), and click New. Blender adds a Principled BSDF automatically and wires it into the Material Output. Name the material after the texture, for example FSMW_oak_planks_01, so you can find it again once your project has more than one material.
Then switch to the Shading workspace at the top of the tab bar. You get the Shader Editor at the bottom and the 3D viewport above it, which makes it much easier to check every node against the model right away.
 AI-generated
Understanding the Principled BSDF
The Principled BSDF is Blender's default shader and covers most materials, from metal to plastic to fabric. For our textures you only need four inputs: Base Color, Roughness, Metallic, and Normal. Leave the rest, Transmission, Coat, Sheen, at their defaults for stone, wood, metal, and concrete surfaces, since none of our current textures need them.
Base Color takes the diffuse texture, Roughness and Metallic get their values from the ARM map, and Normal runs through its own Normal Map node. Once wired up, swapping in a different texture from our catalog only means loading different image files, the rest of the node setup stays exactly the same.
IOR can stay at its default of 1.5, which is a fine approximation for stone, wood, and most non-metallic building materials. Alpha isn't needed for our textures either, since none of the five current surfaces has transparent areas, so it stays at 1.0.
Adding the Diffuse texture
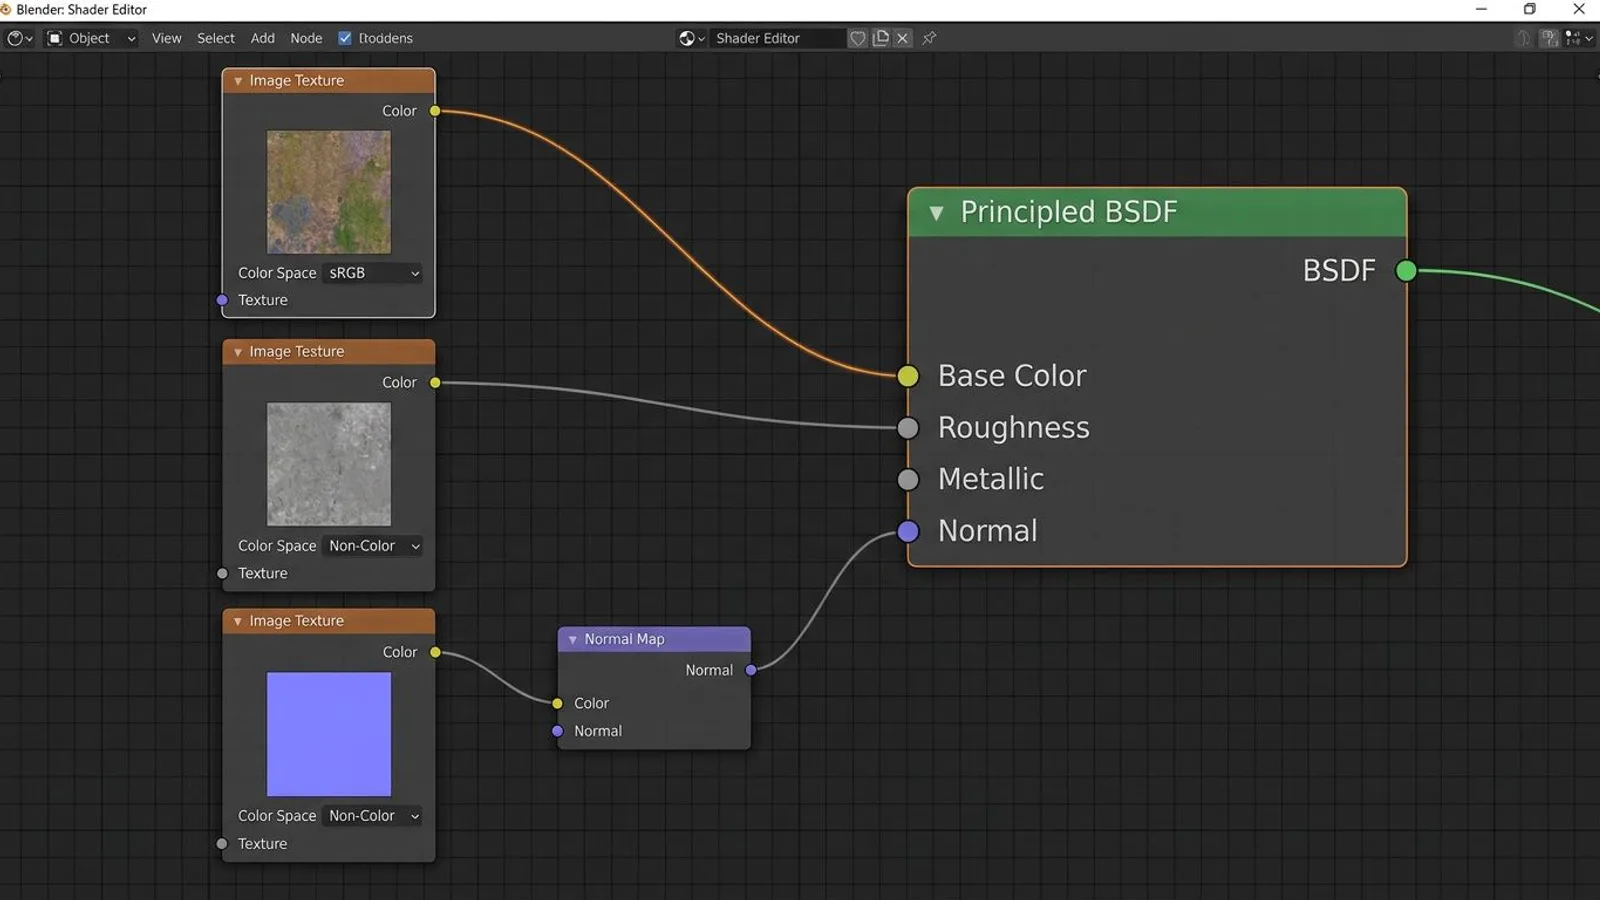
Add an Image Texture node (Add, Texture, Image Texture) and load the file ending in _diff, for example FSMW_cracked_concrete_01_diff_4k.jpg. Connect its Color output to Base Color on the Principled BSDF.
The color space for the diffuse map stays on sRGB. That's Blender's default and it's correct here, since this file genuinely contains color values meant for human eyes. Every other map in our pack gets switched to Non-Color instead, which you'll do in the next steps.
Adding Roughness and Metallic
For Roughness, add another Image Texture node, load the _rough file, set its color space to Non-Color, and connect the Color output to Roughness on the Principled BSDF. Non-Color means Blender applies no color transform at all and reads the pixel values as plain numbers, exactly what you want for brightness-style data like roughness.
We don't ship a separate metallic file, because the metallic value already lives in the blue channel of the ARM map. The next section shows you how to pull it out.
 AI-generated
Setting up the Normal Map
Between the Image Texture node and the Principled BSDF, a normal map always needs a Normal Map node in between (Add, Vector, Normal Map). Load the _nor_gl file into a new Image Texture node, set its color space to Non-Color, and connect the Color output to the Color input of the Normal Map node. Its Normal output then goes into the Normal input on the Principled BSDF.
Blender renders and bakes using the OpenGL convention by default, where the green channel points up. Our _nor_gl files are built exactly for that, so there's nothing to flip or invert here. For DirectX-style maps and for baking your own normal maps, see our dedicated normal map guide.
Splitting the ARM map into Roughness and Metallic
The ARM file packs three maps into one image: Red is AO, Green is Roughness, Blue is Metallic. That saves disk space and one extra texture load, but it also means you need to split the channels apart again inside Blender.
Add an Image Texture node, load the _arm file, and set its color space to Non-Color. Connect its Color output into a Separate Color node (Add, Color, Separate Color, Mode RGB). That node gives you three outputs, Red, Green, and Blue. Connect Green to Roughness and Blue to Metallic on the Principled BSDF. Leave the Red output, the AO data, unconnected for now.
| Channel | Content | Target in Blender |
|---|---|---|
| Red | Ambient occlusion | No direct Principled input, see below |
| Green | Roughness | Roughness on the Principled BSDF |
| Blue | Metallic | Metallic on the Principled BSDF |
If you'd rather work with single files, use _rough for Roughness on its own. There's no standalone metallic file, because that blue-channel signal always lives inside the ARM map. On Rusty Corrugated Metal 01 the metallic value in the blue channel sits noticeably above zero, while on concrete or cobblestone it's close to zero. That's exactly why it's worth checking the blue channel before you set a flat metallic value by hand. See our ORM and ARM maps guide for more on how the channels are built.
One detail people miss: Interpolation on the Image Texture node defaults to Linear. For the displacement map, Blender's own documentation recommends Cubic instead, since it gives smoother results for bump and height data. Leave Diffuse, Roughness, and Normal Map on Linear, where you want to keep the texture's sharpness.
What to do with the AO map
The Principled BSDF has no dedicated ambient occlusion input, and that's not an oversight: AO describes how strongly corners and crevices get shadowed by ambient light, something a physically based shader is supposed to work out itself from geometry and lighting. The baked AO map in our pack is mainly meant for real-time engines that can't afford that calculation live, think GIANTS Engine, Unity, or Godot.
If you still want to see the AO effect in Blender, say for a viewport preview render, you can run the Red output of the Separate Color node through a Mix node set to Multiply against the Color output of the diffuse texture, and only then plug the result into Base Color. That's a compromise, not a physically correct solution, since it permanently bakes the AO information into the base color. For the final look in your target engine, the separate AO file usually does the job on its own.
Connecting Displacement briefly
For real surface structure, on top of the normal map, you need Displacement, which actually deforms the geometry instead of just tricking the light. Add an Image Texture node with the _disp file (Non-Color), route it through a Displacement node, and connect that node's output to the Displacement input on the Material Output, not on the Principled BSDF. We cover Midlevel, Scale, and the subdivision you need for this to look right in our displacement guide, since that topic has enough pitfalls of its own.
 AI-generated
Setting the tile scale with the Mapping node
Every one of our textures is built for a specific tile size, listed on the product page. Oak Planks 01, for example, tiles at 1.2 meters, meaning one repeat of the texture equals 1.2 m in the world. Without adjustment, Blender simply stretches the texture across the UV range of 0 to 1, regardless of the object's actual size, and the result usually looks too coarse or too fine.
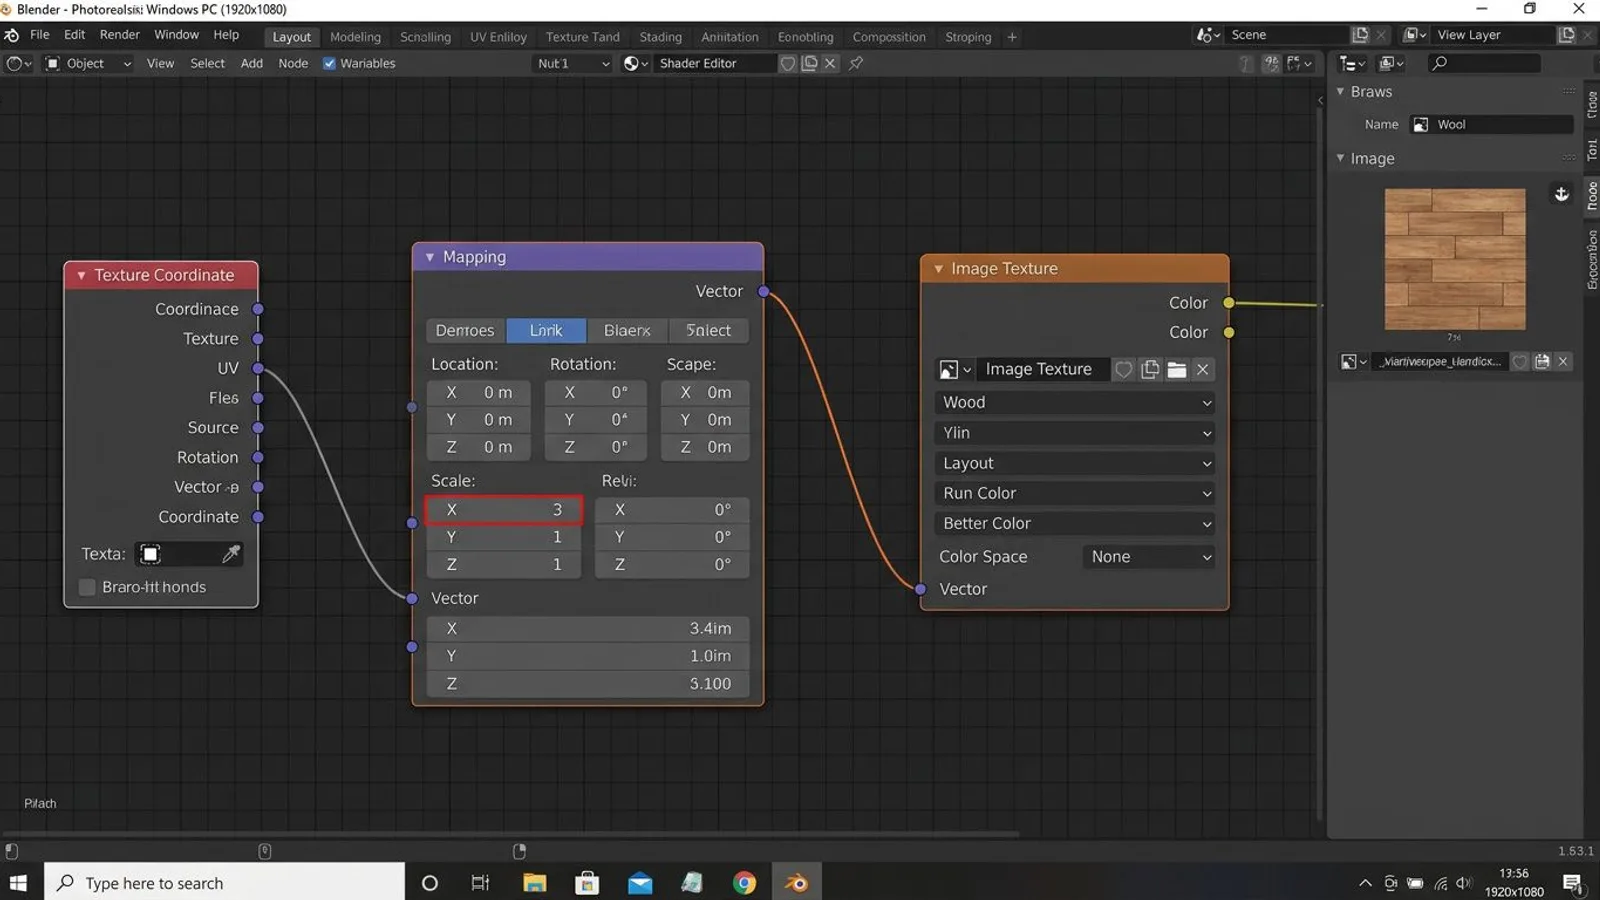
Add a Texture Coordinate node (Add, Input, Texture Coordinate) and a Mapping node (Add, Vector, Mapping) between the object and your Image Texture nodes. Connect UV from the Texture Coordinate node to Vector on the Mapping node, and the Mapping node's Vector output to the Vector input of every Image Texture node.
The math for the Scale value is simple: object size on that axis, divided by the texture's tile size. A 3.6 meter wide wall using Oak Planks 01 (1.2 m tile) gets Scale X = 3.6 ÷ 1.2 = 3. On uneven surfaces, set X and Y separately so the boards don't look stretched or squashed.
One thing worth understanding: the Mapping node treats UV coordinates using the Point vector type, where scaling works in reverse. A higher Scale value compresses the coordinates, which makes the texture repeat more often and therefore look smaller, while a value below 1 makes the tile appear larger. That's exactly the behavior you want here, since a bigger surface should repeat a small tile more often. The Extension property on the Image Texture node defaults to Repeat, which is what makes the texture actually tile past the 0 to 1 range instead of stretching at the edges. If you've accidentally switched that to Extend or Clip, you'll stop seeing any repetition.
Putting Node Wrangler to work
Node Wrangler ships with Blender, you just need to enable it: Edit, Preferences, Add-ons, search "Node Wrangler", tick the checkbox. Then select your Principled BSDF node and press Shift-Ctrl-T (Add Principled Setup). In the file browser that opens, select all the maps for one texture at once, _diff, _nor_gl, _rough, and _arm, for example. Node Wrangler reads the filenames to figure out which map is which, creates the matching Image Texture nodes, sets the correct color space automatically, and wires everything into the Principled BSDF, including the Normal Map node.
What Node Wrangler can't do automatically is split the ARM map into Roughness and Metallic, you still need the Separate Color node by hand for that. For single-file setups without ARM packing, though, the add-on saves most of the clicking.
Node Wrangler also brings a second handy tool, the quick access menus under Shift-W in the Shader Editor. That lets you preview a single node at the Material Output, for example just the normal map or just the AO channel, without unplugging the rest of your setup first.
Opening our 3D models in Blender
For our 3D models, like Modern Pergola, we ship several formats: a .blend file with textures already packed in, an .fbx with textures in a companion .fbm folder, and a .gltf with a separate .bin file and a textures folder.
The .blend file is the easiest route: double-click it or use File, Open, and you're done, material and textures are already wired up. For glTF, go to File, Import/Export, glTF 2.0 (.glb, .gltf), which is enabled by default. For FBX, use File, Import, FBX (.fbx). Either format drops the model into your scene with its own origin, so check the scale afterward, since some source applications export in centimeters instead of meters.
These models are meant on top of our plain GIANTS package, which comes without a Placeable wrapper for building directly into your own FS25 mod. For Blender, Godot, Unity, or Unreal, use the formats described here instead.
After importing, it's worth checking the Shader Editor: glTF and FBX imports make Blender rebuild the material nodes on its own, and in the process the Normal Map node or the color space on individual maps can end up different from what you'd set up by hand. Check that the normal texture is really on Non-Color and that a Normal Map node sits between the image and the Principled BSDF before you continue working.
Common problems
| Problem | Cause | Fix |
|---|---|---|
| Texture looks pale, washed out, or too bright | A Non-Color map is set to sRGB, or the other way around | Set Diffuse to Color/sRGB, and Roughness, Normal, ARM, AO, and Displacement to Non-Color |
| Surface looks flat, no bumps visible | Missing Normal Map node, image plugged straight into the Normal input | Route the Image Texture node through a Normal Map node instead of connecting it directly |
| Tiling looks too coarse or too fine | Missing Mapping node or wrong Scale calculation | Scale = object size ÷ texture tile size, see the worked example above |
| Metallic areas stay completely gray with no reflection | Blue channel of the ARM map isn't connected to Metallic | Add a Separate Color node and connect its Blue output to Metallic |
| Shift-Ctrl-T doesn't do anything | Add-on is installed but not enabled, or no Principled BSDF node is selected | Enable "Node Wrangler" under Preferences, Add-ons, and click the BSDF node before using the shortcut |
Frequently asked questions
Which Blender version do I need for your textures?
Any reasonably recent version works, because the Principled BSDF, Image Texture and Normal Map nodes have been stable for years. We test and write against the current LTS release, Blender 5.2.
Why does my texture look washed out or wrong after I add it?
Usually the color space is set wrong. Only the diffuse map belongs on sRGB. Roughness, Normal, ARM, AO and Displacement belong on Non-Color, because they hold measurement data, not colors meant for a screen.
Where do I plug in the ambient occlusion map?
Nowhere directly on the Principled BSDF, since it has no AO input at all. AO is meant for real-time engines like GIANTS or Unity. In Blender you can at most mix it into Base Color through a Multiply node for a rough preview.
How do I get the tile scale right?
Use the Mapping node's Scale field. Divide the object size by the texture's tile size. Oak Planks 01 has a 1.2 m tile, so a 3.6 m wide surface needs Scale 3.
Do I need to install Node Wrangler separately?
No, the add-on already ships with Blender. Just search for it under Preferences, Add-ons, and tick the checkbox.