3ds Max: Setting Up a PBR Material with OpenPBR and Normal Maps
3ds Max 2027 defaults to the OpenPBR material introduced with 3ds Max 2026, with dedicated slots for Base Color, Roughness, Metalness, and Normal; the older Physical Material remains available alongside it.
- Version
- 3ds Max 2027 (current) – OpenPBR default material since 3ds Max 2026
- You need
- Windows, 3ds Max with the Arnold renderer installed (default)
- PBR maps
- Base Color, Specular Roughness, Base Metalness, Geometry Normal Map
- Time
- 20 minutes
3ds Max switched its default material. Since 3ds Max 2026, a new scene automatically creates an OpenPBR material instead of the previous Physical Material, and the current 3ds Max 2027 continues that. For our PBR textures, the underlying principle barely changes, but the controls and slot names do. This guide walks through assigning our maps, using Rusty Corrugated Metal 01 as the example, in the OpenPBR Material, explains why per-bitmap gamma settings decide whether roughness and normal maps are even computed correctly, and covers getting our FBX models cleanly into the scene.
For us, 3ds Max is usually a waypoint: many modders build a building or a prop here for Farming Simulator 25 before the finished geometry gets carried further as an i3d through the GIANTS pipeline. But the PBR preview in 3ds Max already decides how convincing concrete, wood, or sheet metal look, long before anything touches FS25.
OpenPBR Material or Physical Material?
Autodesk added support for OpenPBR, an open material standard, with 3ds Max 2025.3. Since 3ds Max 2026, the OpenPBR Material has been the default for new scenes; the previous Physical Material is still built in and keeps working in older scenes, but Autodesk no longer suggests it for new work. If you're rendering with Arnold, which has been 3ds Max's default renderer for many versions now, you can also wire up Arnold's own OpenPBR Surface or Standard Surface shader directly in the Slate Material Editor; for everyday texturing, though, the native OpenPBR Material is enough.
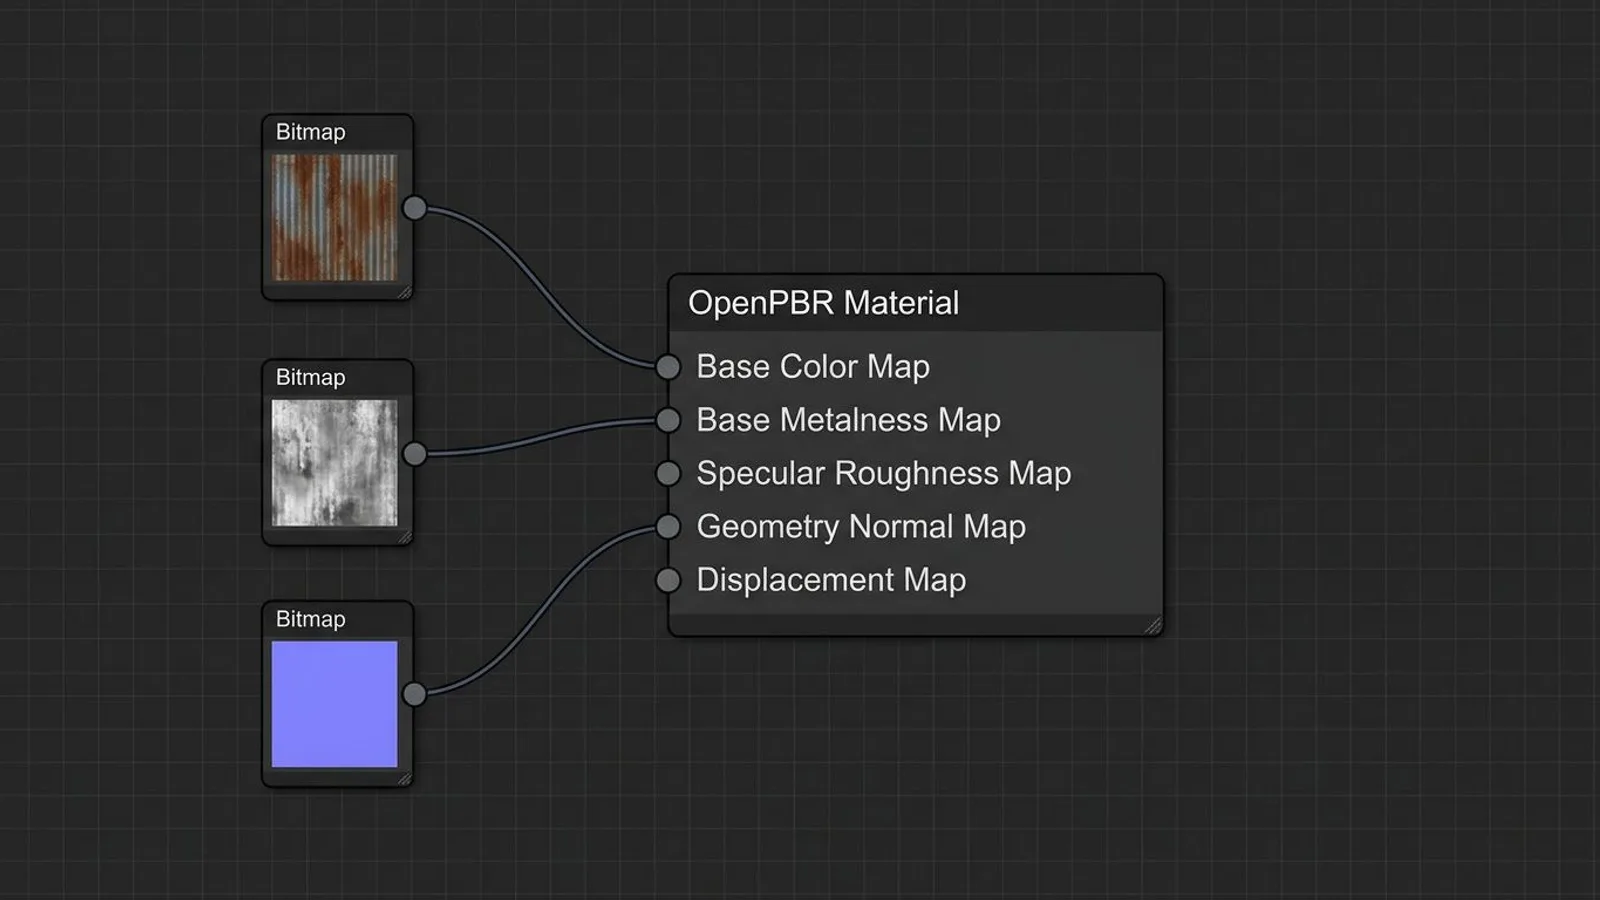
The two materials name their slots differently:
| Our file | OpenPBR Material | Physical Material |
|---|---|---|
_diff (base color) |
Base Color Map | Base Color Map |
_rough (roughness) |
Specular Roughness Map | Roughness Map |
Metallic (from _arm, blue channel) |
Base Metalness Map | Metalness Map |
_nor_gl (normal) |
Geometry Normal Map | via Bump Map with a Normal Bump node |
_ao (ambient occlusion) |
no dedicated slot | no dedicated slot |
_disp (displacement) |
Displacement Map | Displacement Map |
Worth noting: neither OpenPBR nor Physical Material has its own ambient occlusion slot. That's not a gap in our texture package; both materials compute AO from actual raytraced scene lighting instead of reading a precomputed map. If you still want to use our _ao map, say for fast viewport previews without lighting set up, multiply it into the base color texture in an image editor rather than looking for a slot to drop it into.
Physical Material also has an Invert Roughness option that OpenPBR lacks: a checkbox that reinterprets a roughness map as a glossiness map without re-exporting the file. Our _rough files are already standard roughness maps, so you won't need it. If you're maintaining an older scene built on Physical Material, the same mapping from the table above still applies, just under the names in the right-hand column instead of the middle one.
 AI-generated
If you work directly with Arnold's own shading network instead, the Slate Material Editor's Arnold category has a Standard Surface node using the same basic terms: base color goes into Base Color, our roughness map into Specular Roughness, the metallic map into Metalness. For the normal map, wire a Normal Bump node into the Standard Surface's Bump input — the same node OpenPBR and Physical Material use for normal maps. Since 3ds Max 2025.3, Autodesk also ships an OpenPBR Surface node inside Arnold that mirrors the same parameters as the native OpenPBR Material, but computes them in the Arnold renderer instead of 3ds Max's own viewport renderer.
Step 1: Load bitmaps and set gamma correctly
Before dragging a map into a slot, there's one question that causes most of the visible errors in practice: gamma. According to Autodesk's documentation, 3ds Max automatically applies gamma correction when loading a bitmap file unless the file has its own embedded gamma value: 2.2 for 8-bit and 16-bit formats, 1.0 for floating-point formats. That's exactly right for our _diff file, since it's meant as a color value in sRGB space. It's wrong for _rough, the metallic map, _nor_gl, and _disp: those are linear data values, not colors, and an automatic 2.2 correction silently distorts them. Open the bitmap dialog for those files, enable the Override option there, and set the gamma value to 1.0.
Step 2: Assign the maps to the right slots
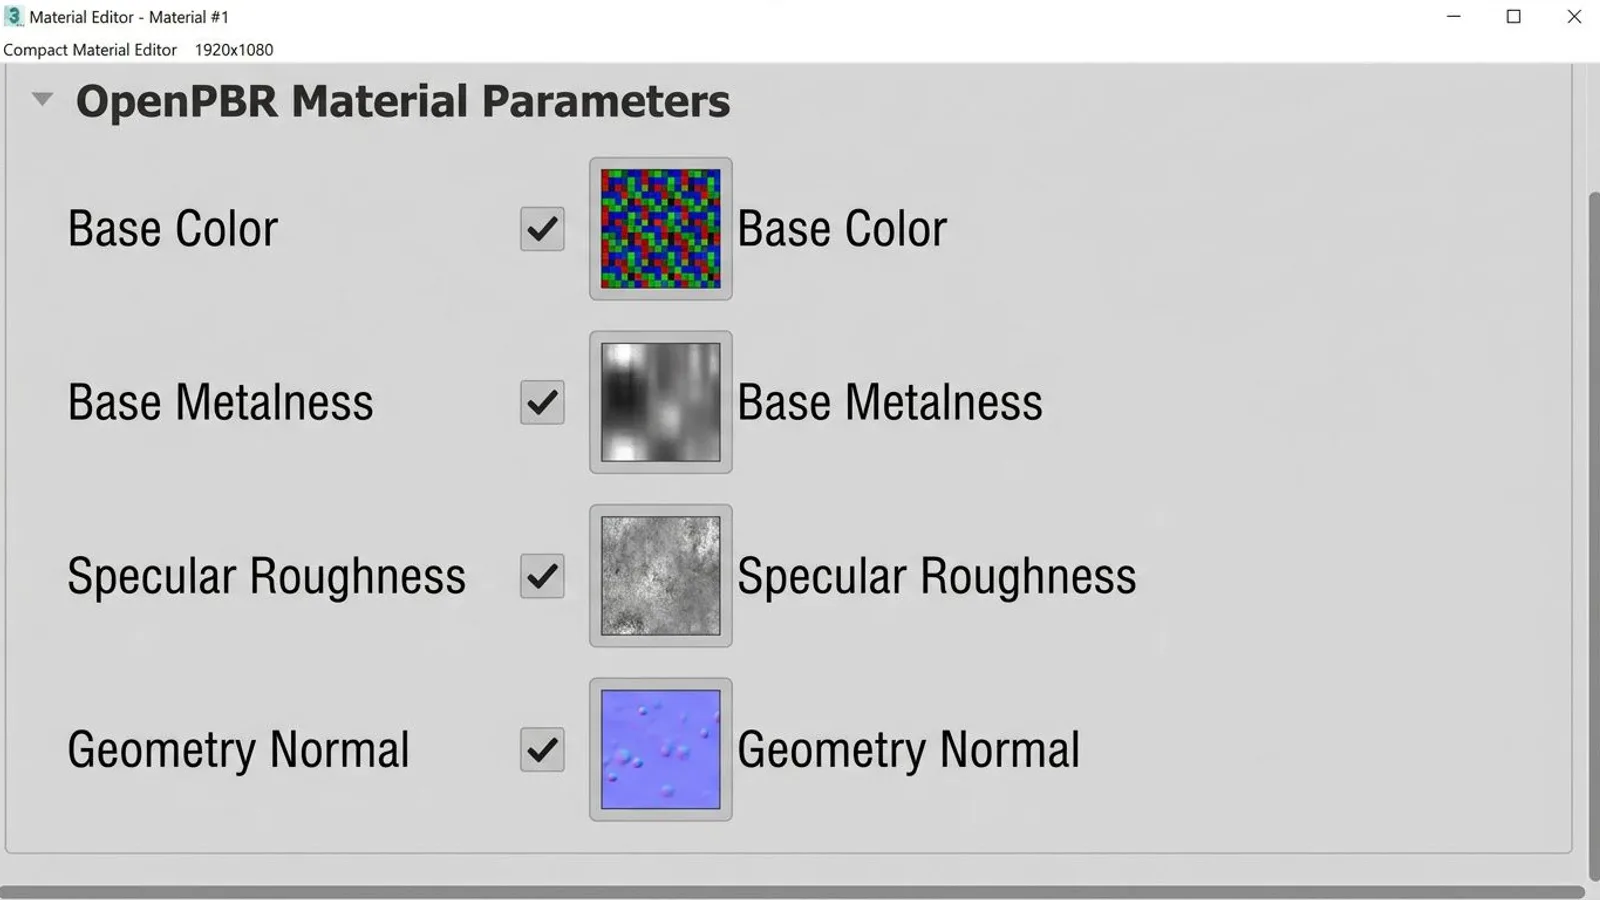
Create an OpenPBR Material, open it in the Slate or Compact Material Editor, and drag a bitmap node each into Base Color Map, Specular Roughness Map, and Base Metalness Map. For the metallic information you'll need a separate grayscale file made from the blue channel of our _arm texture, since OpenPBR, like SketchUp, doesn't read packed ORM files directly. Finally, drag _nor_gl into Geometry Normal Map.
 AI-generated
Normal maps: Flip Red, Flip Green, Swap Red & Green
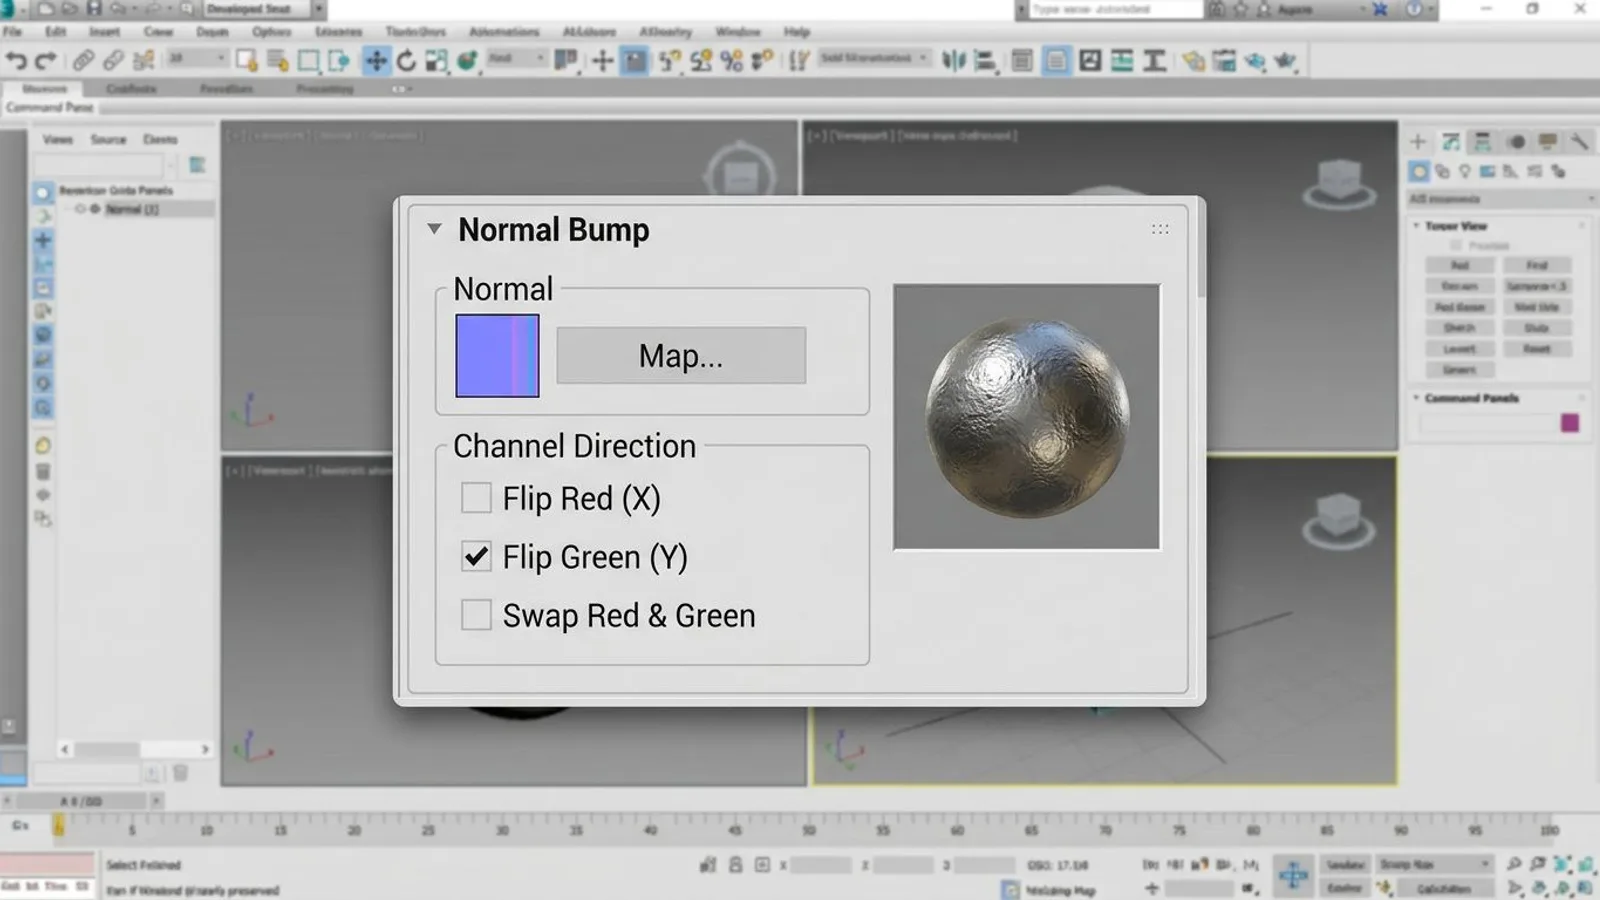
3ds Max doesn't read a normal map directly as a bitmap in a slot; it goes through a dedicated node called Normal Bump, wired between the bitmap and the target slot. Per Autodesk's reference, it has a "Channel Direction" group with three controls: Flip Red (X) mirrors the left-right axis, Flip Green (Y) mirrors the up-down axis, and Swap Red & Green swaps both channels, rotating the normals as a result. Autodesk's documentation doesn't explicitly state whether 3ds Max expects OpenGL or DirectX normal maps by default; it only documents these three controls.
In practice, that means: load our _nor_gl file into the Normal Bump node's Normal slot. If the surface looks caved in rather than raised in the rendered image — dents where there should be bumps — that's a clear sign of the wrong channel convention, and you enable Flip Green (Y) until it looks right. Forum posts from other users claim Arnold's Standard Surface shader expects OpenGL normal maps by default, but that isn't documented in Autodesk's official reference, so a visual check in your own render stays the reliable way to confirm it. If you're also working in Maya, say because a colleague continues modeling there, the same principle applies to the channel flip, just under different control names — see our Maya guide for details.
 AI-generated
For more on how normal maps are actually computed from a high-poly reference and why the direction of their channels matters at all, see our more detailed introduction to normal maps. For an overview of all our PBR map types and how they work together, see the introduction to PBR textures.
Tile size and FBX import
Step 3: Tile size via Real-World Map Size
3ds Max can express a bitmap texture's size in scene units instead of UV tiles. Enable Real-World Map Size in the coordinate rollouts of a material or mapping modifier, and every object carrying that material automatically uses the same real-world tile size. For our Cobblestone 01 texture, enter 1.5 m there; for Oak Planks 01, 1.2 m — the values we measured each texture against ourselves.
Step 4: Import our FBX models
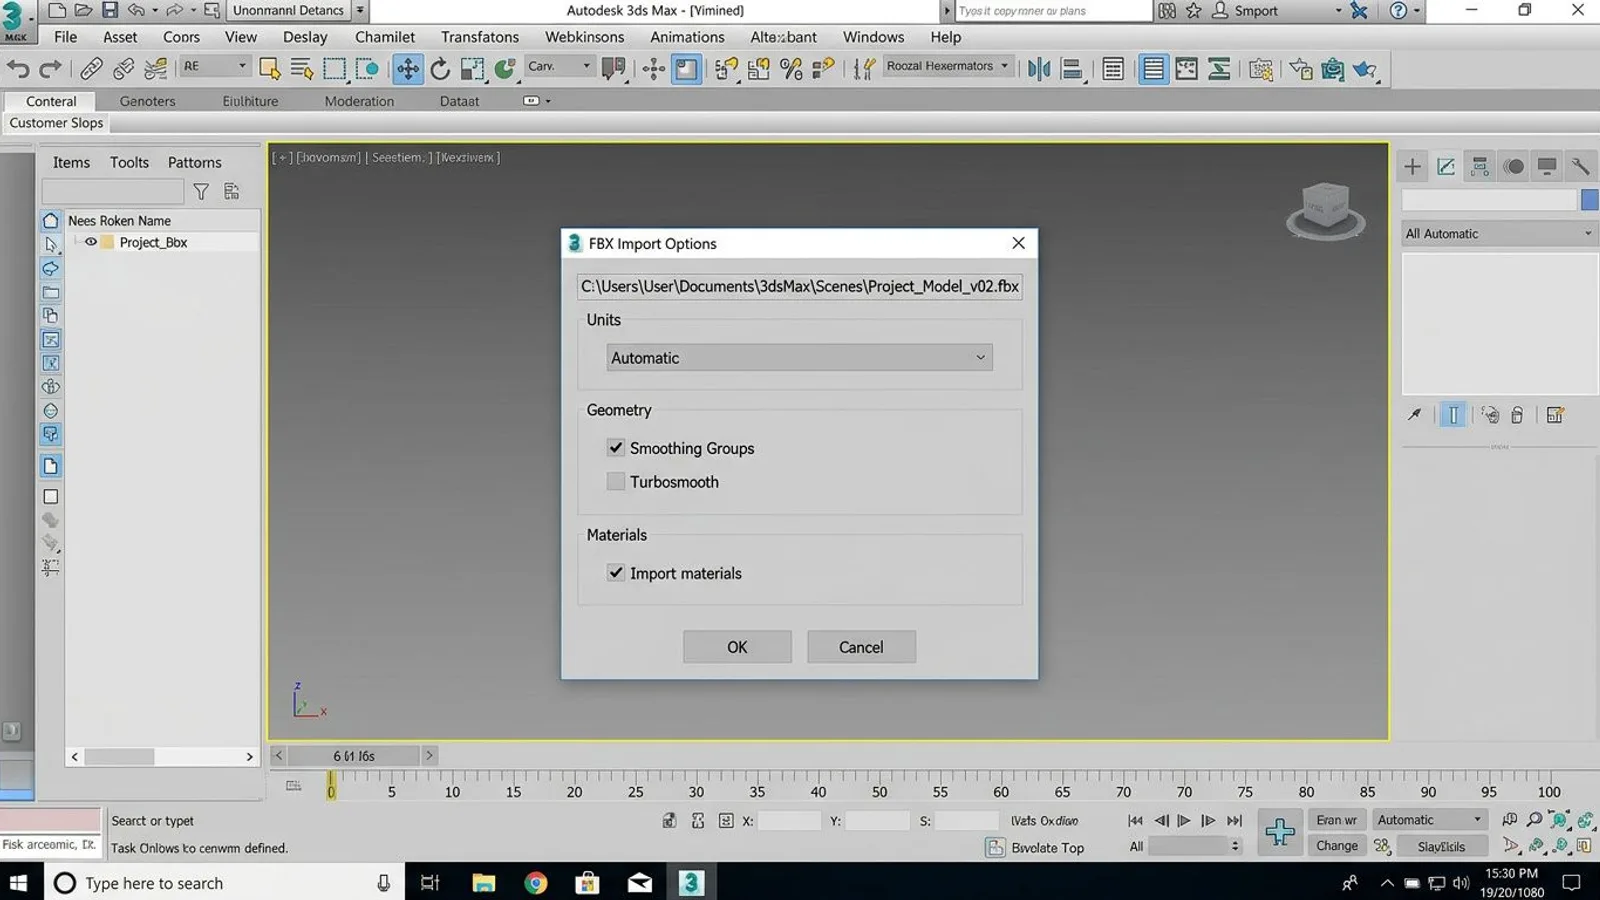
Our 3D model packages ship a .blend and a .gltf alongside an .fbx file with textures in an .fbm folder. To import, choose Application menu > Import in 3ds Max, locate the .fbx file, and confirm the import dialog. Afterward, check the scene units: 3ds Max distinguishes between system units and display units, and a mismatched setting can make a model appear unexpectedly huge or tiny on import. The FBX's texture paths point relatively at the .fbm folder; keep it next to the .fbx file and 3ds Max finds the textures automatically. If you move only the .fbx file without the .fbm folder, 3ds Max still links the model, just without textures — you'll then need to reassign the bitmaps manually in the Slate Material Editor.
 AI-generated
Common problems
| Problem | Cause | Fix |
|---|---|---|
| Roughness or normal map looks wrong or too high-contrast after loading | 3ds Max auto-decoded the bitmap with gamma 2.2 | Enable the Override option in the bitmap dialog and set the gamma to 1.0 |
| Normal map looks caved in instead of raised | Wrong channel convention in the Normal Bump node | Enable Flip Green (Y) in the Normal Bump node |
| Metallic or AO map won't assign directly | Tried to load the packed ARM file into a single slot | Extract the blue channel for metalness separately; multiply AO into base color instead |
| Model is huge or tiny after FBX import | 3ds Max's system and display units don't match the export file | Check and align units in Preferences before importing |
| Textures missing after FBX import | The .fbm folder with texture files isn't next to the .fbx file |
Keep the download's folder structure intact, or manually relink the paths in the material |
Frequently asked questions
Which material should I use for PBR textures in 3ds Max 2027?
The OpenPBR Material, the default for new scenes since 3ds Max 2026. It replaces the older Physical Material for new work, though Physical Material is still built into 3ds Max and keeps working in existing scenes.
Which slot does the normal map go into on the OpenPBR Material?
The "Geometry Normal Map" slot. Before that, enable the Override option on the normal map file's bitmap node and set its gamma to 1.0, because it's linear data, not color values.
Does 3ds Max expect normal maps in the OpenGL or DirectX convention?
The official Normal Bump Map reference doesn't name the convention explicitly; it only documents the Flip Red (X), Flip Green (Y), and Swap Red & Green controls. If one of our OpenGL normal maps looks inverted in the viewport, Flip Green (Y) is the control to try.
Why does my roughness map look wrong after loading it?
By default, 3ds Max applies a 2.2 gamma correction to 8-bit and 16-bit image files unless the file has a different gamma embedded. For roughness, metalness, and normal maps you need to enable the Override option in the bitmap dialog and set that value to 1.0, since they're linear data, not color.
How do I set a bitmap texture's real-world tile size?
Through Real-World Map Size in the UV coordinate rollouts of materials and modifiers. Every object using the same material then scales automatically to one consistent tile size, measured in scene units.