PBR Textures in Cinema 4D: Redshift Material, Color Space and Tiling for FS25
Since Cinema 4D 2024, a new scene defaults to Redshift as its renderer. This guide builds on the classic Redshift Standard Material: base color goes into Base Color with sRGB, roughness and metalness go into their channels with Raw, the normal map runs through the Bump Map node in Tangent-Space Normal mode, and tiling is set in the texture tag through Tile plus the Length U and Length V fields.
- Version
- Cinema 4D 2026.3.4 (as of 2026-09-25)
- Default renderer
- Redshift since Cinema 4D 2024, Standard/Physical still selectable
- You need
- Cinema 4D with Redshift, our PBR textures or FBX/glTF models
- Import
- FBX and glTF use built-in importers, no extra plugin needed
What a PBR material needs in Cinema 4D
A PBR material splits a surface into separate, physically grounded values: a base color, a roughness value, a metalness value, and a normal map for fine detail without extra geometry. In Cinema 4D these values live in a material's channels in the Material Manager, or, for a Redshift material, as separate inputs on a Redshift Standard Material node in the Node Editor.
Our textures ship six maps per resolution: _diff as base color, _rough as roughness, _ao as ambient occlusion, _disp as a height map, _nor_gl as a normal map in OpenGL convention, and _arm as a packed map with AO in red, roughness in green and metalness in blue. There's no separate metalness file; that value sits in the blue channel of _arm.
 AI-generated
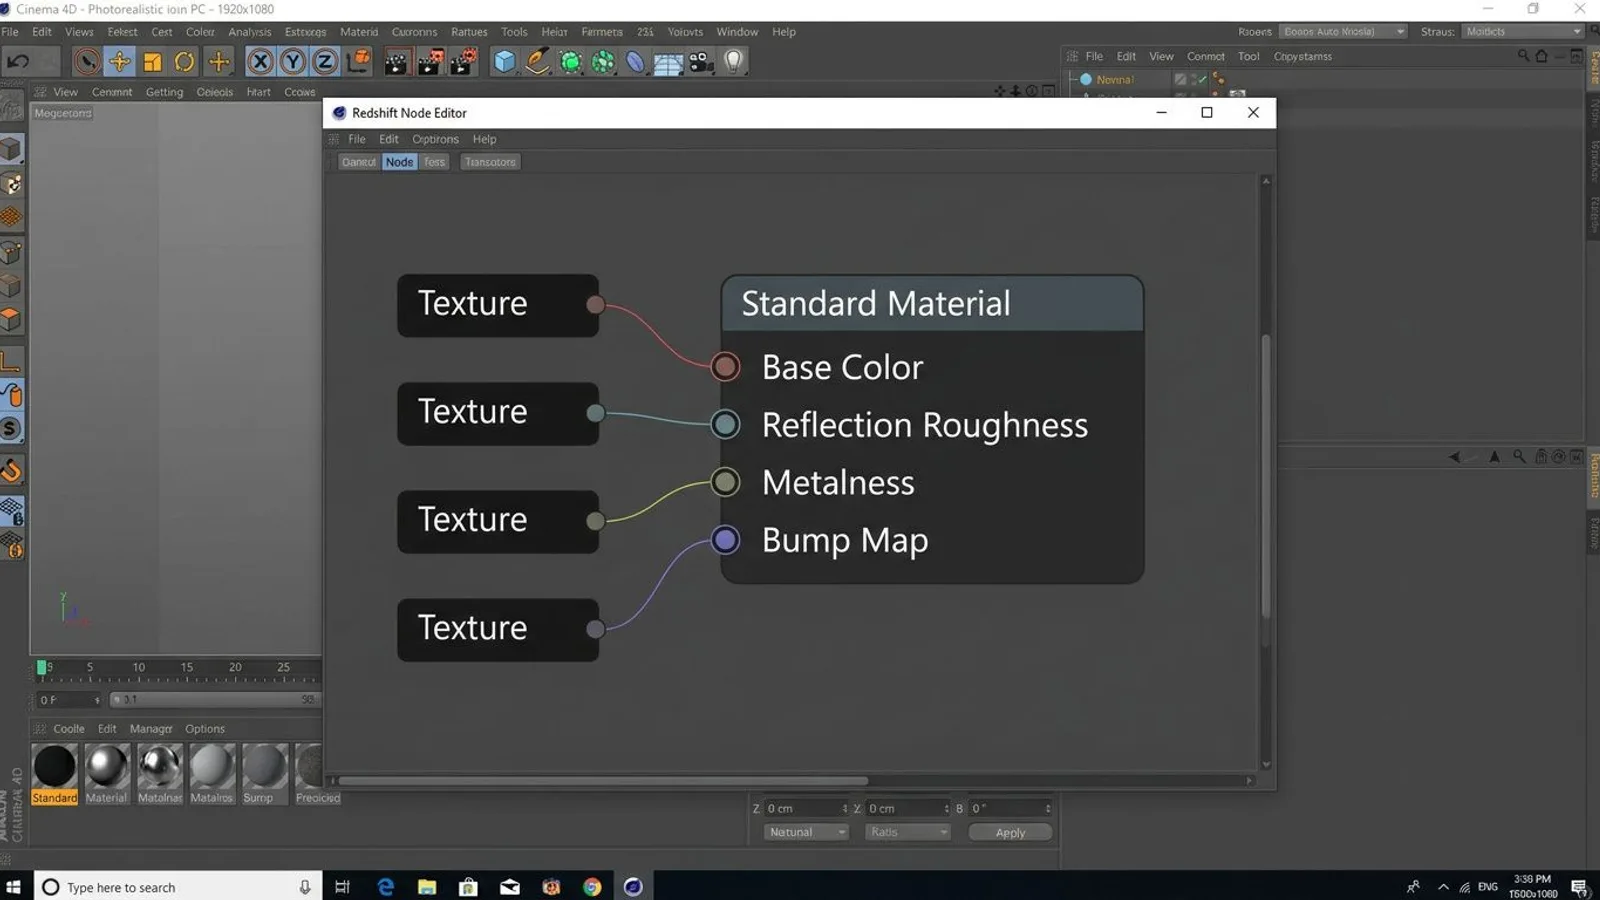
Redshift Standard Material: which map goes where
Since Cinema 4D 2026.2, the New Material command defaults to an OpenPBR material, the new standard for freshly created materials in Redshift. The classic Redshift Standard Material with the channel names in this section stays available alongside it through the Redshift menu in the Node Editor and works exactly as before, which is why we cover it here.
In a Redshift Standard Material's Node Editor, you connect a separate texture node for each file to the matching input on the Standard Material node. Our base color goes into Base Color, roughness into Reflection Roughness, and the blue channel of our packed _arm image into Metalness. Since _arm bundles three values in one image, you don't connect the texture node's full color output; you route a single channel from it instead, either through a color-channel node or by picking the wanted output channel directly on the texture node.
The Redshift Standard Material has no dedicated input for the ambient occlusion map, because AO isn't a direct physical material value, it's pre-baked shading information. The common approach is multiplying the AO map into the base color through a Multiply node before the result reaches Base Color. Our packed red channel from _arm and the separate _ao file carry the same value, so either source works.
| File suffix | Content | Target in the Redshift Standard Material |
|---|---|---|
_diff |
Base color | Base Color |
_rough or _arm (green) |
Roughness | Reflection Roughness |
_arm (blue) |
Metalness | Metalness |
_ao or _arm (red) |
Ambient occlusion | Via a Multiply node into Base Color |
_nor_gl |
Normal map | Bump Map node, Tangent-Space Normal mode |
_disp |
Height | Bump Map node (Height-Field) or displacement |
Color space and gamma: sRGB or Raw
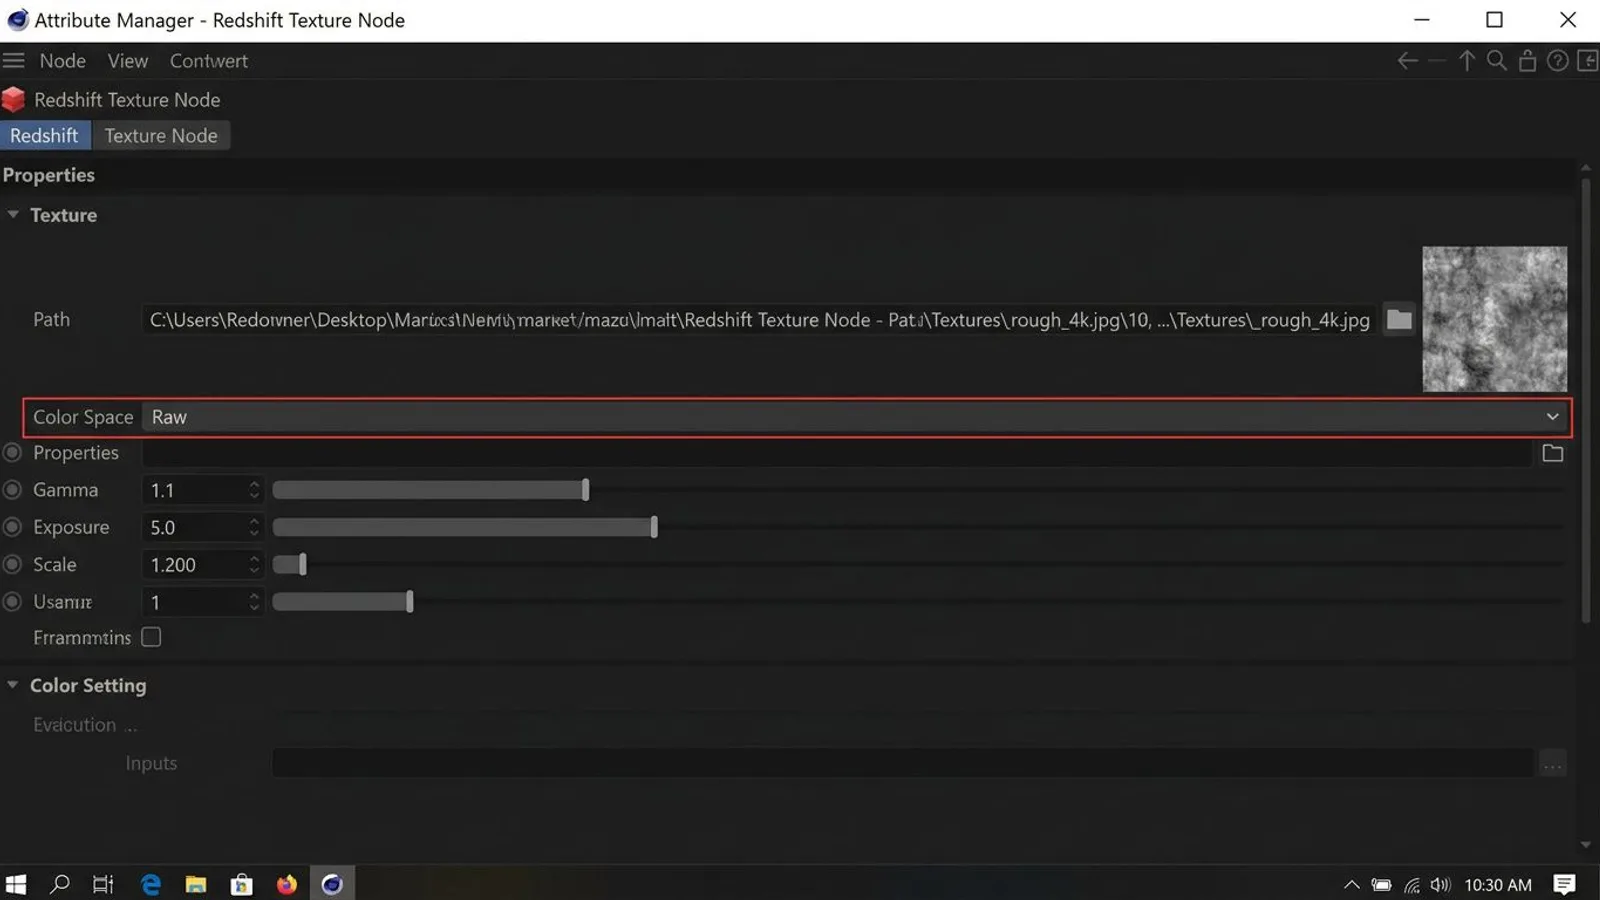
Every texture node in Redshift has a color space setting. Set our base color (_diff) to sRGB, and set roughness, metalness, the packed _arm image and the height map to Raw. For the normal map, Redshift's documentation is explicit about why this matters: gamma should be 1 and the color space should be Raw or linear, otherwise normal mapping doesn't work correctly.
A wrong color space setting doesn't announce itself in the viewport right away. A roughness map left on sRGB reads as uniformly soapy-shiny instead of finely varied, and a normal map with the wrong gamma produces visible dents or bumps on surfaces that should be flat. The fastest way to check is selecting the texture node and looking at the Color Space dropdown in the Attribute Manager, rather than trusting the file name alone.
 AI-generated
Normal maps: the Bump Map node with Flip Normal Y
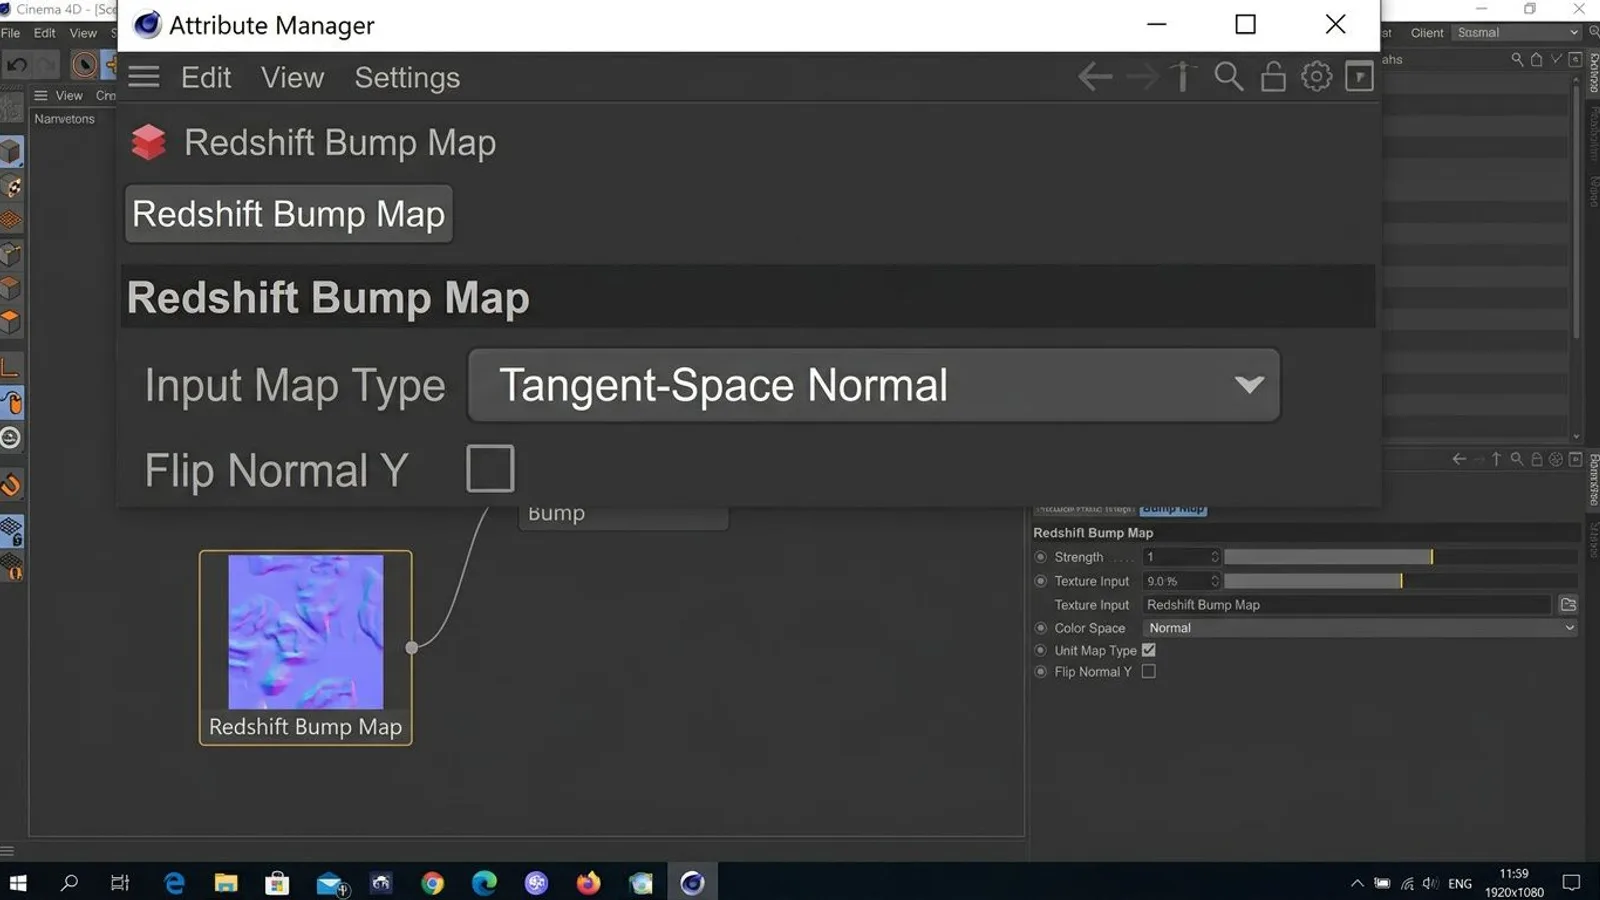
Redshift bundles bump and normal mapping into one shared Bump Map node. The Input Map Type setting lets you choose between Height-Field for classic height maps, Object-Space Normal, and Tangent-Space Normal. For our _nor_gl files, pick Tangent-Space Normal, since these maps work independently of any specific object and apply correctly to any surface, unlike object-bound Object-Space normal maps.
Redshift's documentation explicitly expects normal maps in OpenGL format. If a normal map is in DirectX format instead, its green channel is flipped, visible as details that cave inward instead of pushing outward. The Flip Normal Y option on the Bump Map node fixes exactly that without re-exporting the texture. Our _nor_gl files already follow OpenGL, so Flip Normal Y stays off.
 AI-generated
Displacement in brief
For real geometric displacement instead of just simulated surface detail, the Bump Map node alone isn't enough; that requires tessellation. On the object, add an RS Object tag, enable Tessellation and Displacement in its Geometry section, and connect our _disp map through its own texture node to the material's displacement input. Without tessellation enabled, Redshift treats a connected displacement map as a plain bump, and the geometry stays unchanged.
For our flatter materials like Cracked Concrete 01 or Cobblestone 01, the Bump Map node is enough in most cases. Real displacement pays off mostly on silhouettes that stay visible up close, such as edges or free-standing objects. For flat wall or floor textures viewed from a distance, tessellation's extra render cost often isn't justified by a visible difference.
Tile size: Length U and Length V in the texture tag
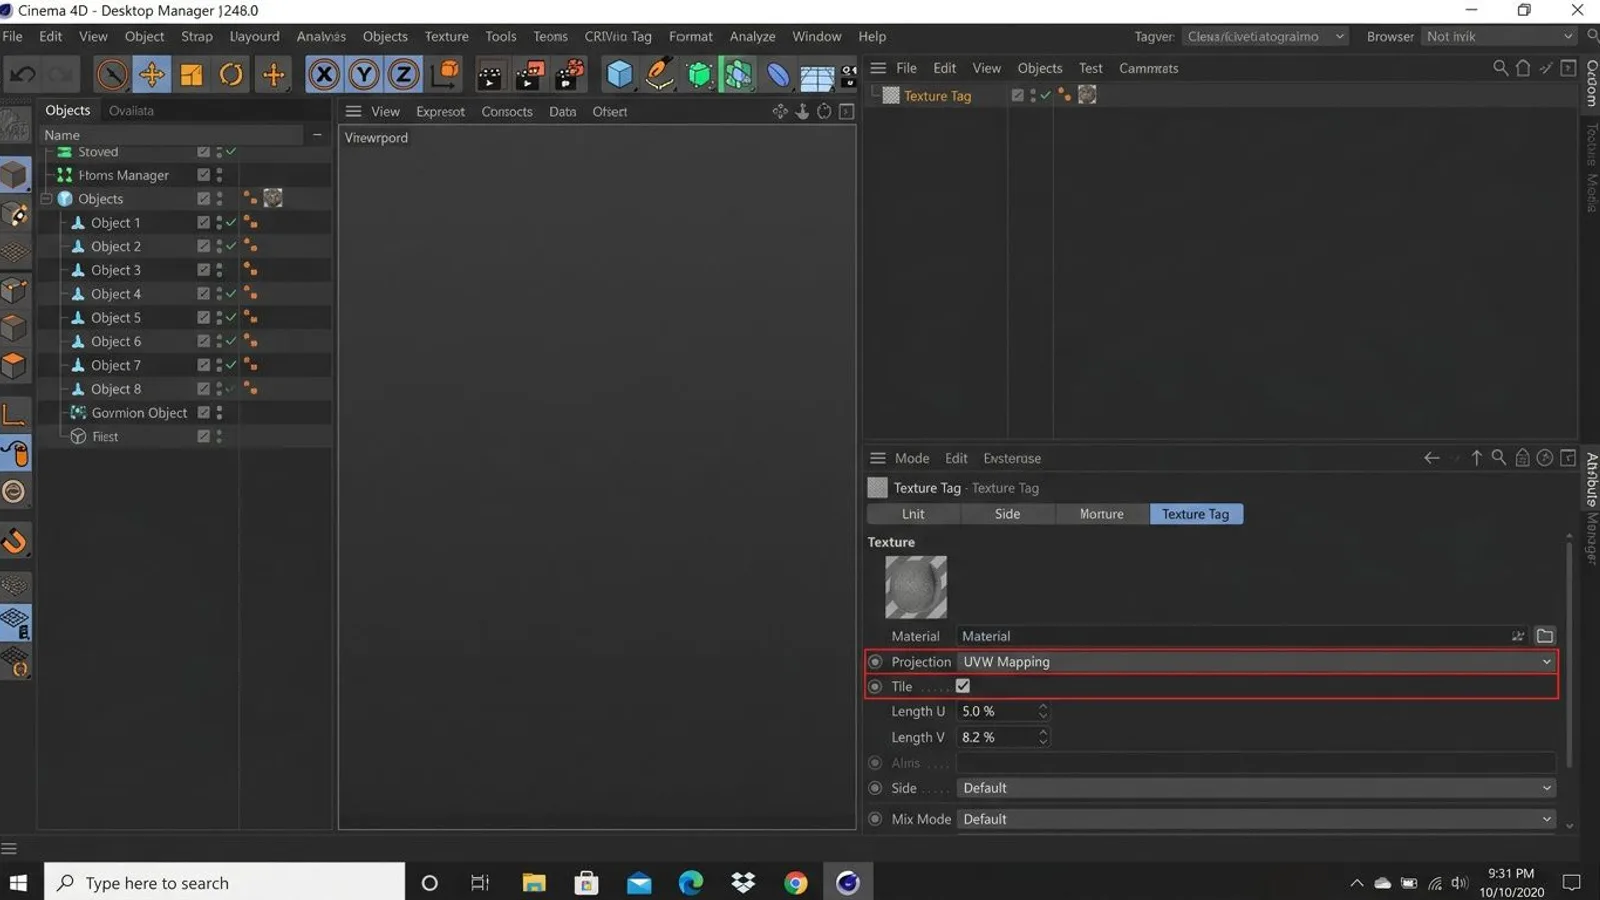
The texture tag on an object controls how a texture projects onto its surface. For our rectangular PBR textures, UVW Mapping is the right starting projection, since it follows the model's existing UV layout. The Tile checkbox in the texture tag turns on repetition, and the Length U and Length V fields then set the size of a single tile relative to the assigned surface: a smaller Length value produces more repetitions in that direction.
In practice, work out the target repeat count the same way as in any other program: the surface's edge length in meters divided by the texture's tile size. A 4-by-2.5-meter wall with our Cracked Concrete texture and its 1-meter tile size should repeat 4 times across and 2.5 times down. You don't enter that target number directly, you adjust Length U and Length V until the tile actually repeats that often in the viewport.
| Texture | Tile size | Target repeats on a 4 × 2.5 m surface |
|---|---|---|
| Cracked Concrete 01 | 1 m | 4 / 2.5 |
| Oak Planks 01 | 1.2 m | 3.33 / 2.08 |
| Cobblestone 01 | 1.5 m | 2.67 / 1.67 |
| Rusty Corrugated Metal 01 | 0.988 m | 4.05 / 2.53 |
| Corrugated Metal 01 | 0.684 m | 5.85 / 3.65 |
 AI-generated
Importing our FBX and glTF models
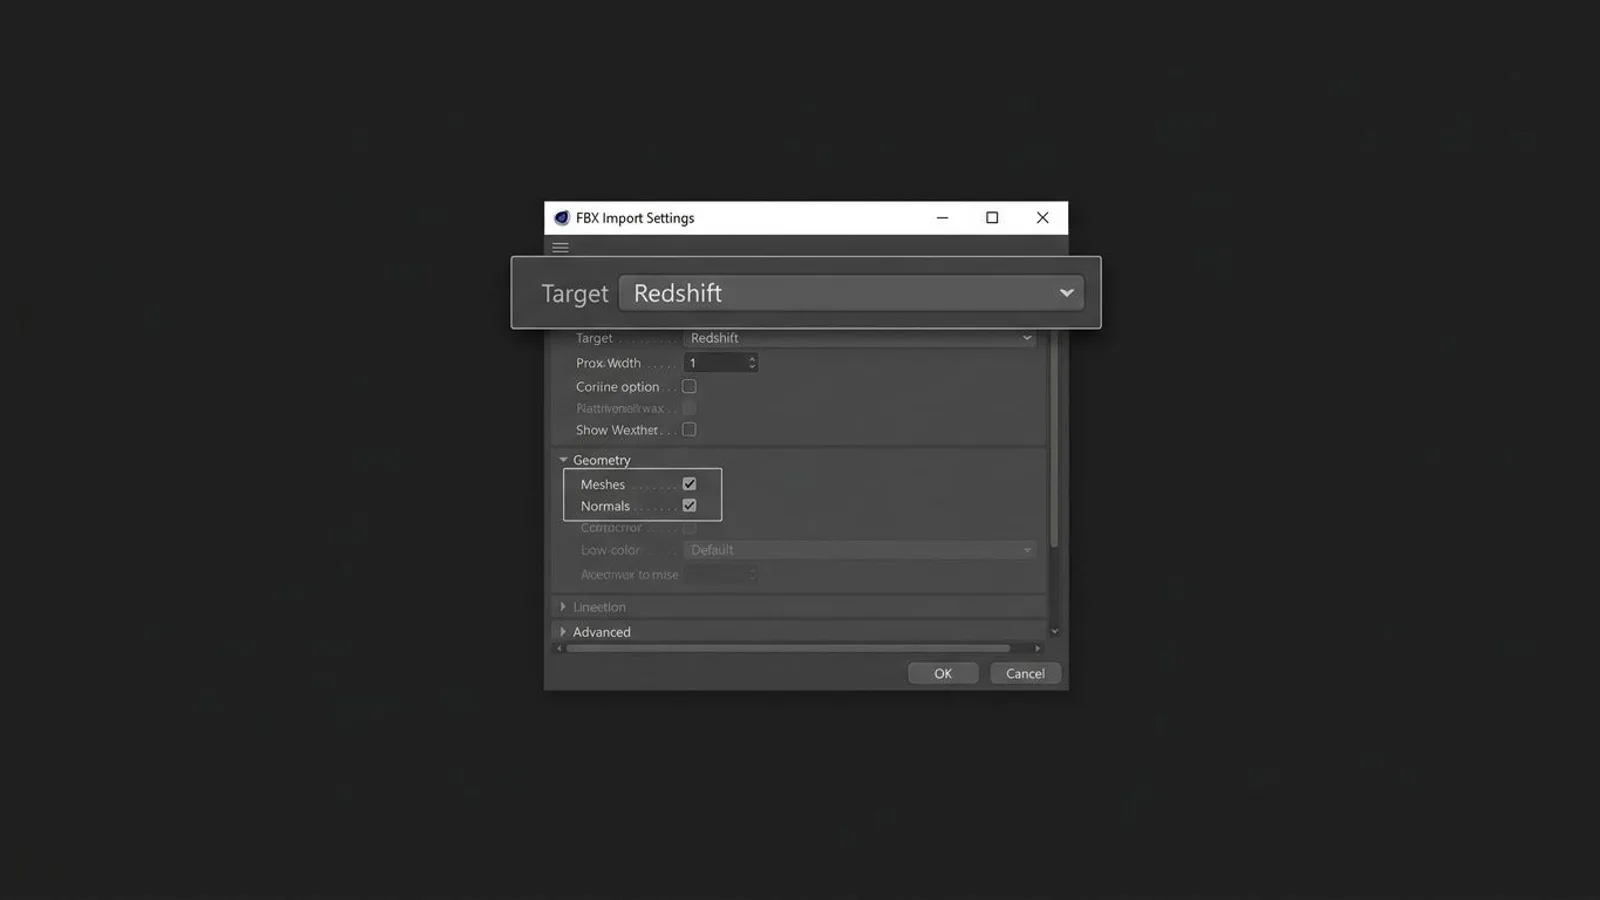
Cinema 4D ships native importers for both formats, so you don't need any extra plugin. During FBX import, through File, Open or File, Merge, the settings dialog's Target option lets you pick which renderer materials, cameras and lights should be interpreted for, usually Redshift. Our .fbx file carries its textures in the accompanying .fbm folder; if a material shows Cinema 4D's default checker pattern after import, that folder has usually been separated from the FBX file.
The glTF import is also native and loads materials along with the geometry, and Cinema 4D supports both the text-based .gltf format and the binary .glb variant. Our .gltf package ships with a separate .bin file and its own textures folder; all three need to keep the same relative path to each other, since the .gltf document references them instead of embedding them.
 AI-generated
How normal maps differ across programs in general is covered in the normal map overview, details on height maps and real displacement live in the displacement map guide, and a general overview of PBR textures is in the PBR textures fundamentals guide.
Common problems in Cinema 4D
| Problem | Cause | Fix |
|---|---|---|
| Normal map looks bulged or dented instead of finely detailed | The normal map's texture node is set to sRGB instead of Raw, or gamma isn't set to 1 | Set the color space to Raw and gamma to 1 |
| Normal map detail looks inverted | The connected file is in DirectX format instead of OpenGL | Enable Flip Normal Y on the Bump Map node |
Displacement has no effect despite a connected _disp map |
Tessellation isn't enabled on the RS Object tag | Enable Tessellation and Displacement under Geometry on the RS Object tag |
| Texture doesn't repeat at the expected tile size | Tile isn't enabled in the texture tag, Length U/V are still at their default, or the projection isn't UVW Mapping | Set the projection to UVW Mapping, enable Tile, and adjust Length U/V until the tile repeats at the calculated rate (edge length divided by tile size) |
| FBX import shows missing textures | The .fbm folder no longer sits next to the FBX file |
Manually point the texture paths in the Material Manager at the unpacked folder |
Frequently asked questions
Should I use Redshift or the classic Standard material for your textures?
New scenes have defaulted to Redshift since Cinema 4D 2024. Since Cinema 4D 2026.2, the New Material command itself defaults to an OpenPBR material; the classic Redshift Standard Material stays available through the Redshift menu. This guide covers the Redshift Standard Material because its channel names have long been documented; C4D's own renderer-independent Standard or Physical material also works with the same six texture files, only the input names and the normal map options differ.
Which color space should I set for your textures in the Redshift texture node?
Only the base color map (_diff) uses sRGB. Roughness, the packed ARM map, the normal map and the height map all belong on Raw in the texture node, because gamma and the color curve would otherwise distort their values.
What does Flip Normal Y do in the Bump Map node?
Redshift expects normal maps in OpenGL format. Flip Normal Y flips the green channel when a normal map is in DirectX format instead. Our _nor_gl files already follow OpenGL, so the option stays off.
How do I set tiling for your texture size in the texture tag?
Through the Tile checkbox plus the Length U and Length V fields in the texture tag with UVW Mapping projection. First work out the target repeat count the same way as in any other program, edge length in meters divided by the texture's tile size, then adjust Length U/V until the tile repeats that many times.
Does Cinema 4D import your FBX and glTF models without extra software?
Yes. Cinema 4D ships its own FBX and glTF importers. For FBX you additionally pick the target renderer for materials, cameras and lights, usually Redshift.